Category Archives: Review

Trying out Hoya ProND 1000 with 10-stops
Is Hoya ProND 1000 filter with 10-stops worth buying?
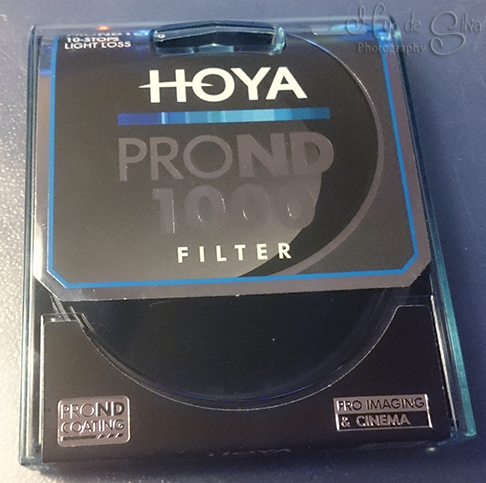
Hoya ProND 1000
Many people seemed to like this ND filter because of the valuable price and because it did not go towards the red or green colors. It is what it is suppose to be, neutral in colors. This filter have 10-stops which means it is a very dark filter which basically do not let in much light and you can use that for long exposures. When you want to use it you need to focus on the object before you put the ND filter on. So why you want to have long exposures? See the picture below then you will see what happens to the water.
It looks like smoke or fog is between the stones. The ocean waves are coming fast and hitting the stones and splashes all over but you won’t see that since the picture will make the moving objects look more smooth. When you have a long exposure the camera captures everything that happens within the limited time you want and it will become one combined picture.

The picture above was taken in Bulb mode with 56 sec in exposures. The hard part is to know how many seconds you are suppose to have since you wont be able to see the picture while doing it. The LCD screen will be dark even if you have chosen to see the image through it. Using slow shutter speed will make the picture cool and mystical.
It is all about guessing how long time you need to make the perfect picture. There are mobile apps that can calculate this for you so that you know exactly how many seconds you need to make the picture brighter after putting on the filter.
An advice is that you use the zoom in button on your camera when you are ready to focus on something. For example the picture above, here it is good to focus on a stone and zoom in to see that it becomes real sharp. Then just leave it like that and press the button to take the picture.

To see the picture better click on it to get a bigger size and more details. This picture of the waterfall have a exposure time of 49 seconds. The water becomes softer when you have long exposure. The light in the picture will also become brighter the longer you keep the shutter open. The leaves in the picture is still very visible since they are laying still compared to the waterfall. A tripod is a must when you have to wait for so long to take a picture. The good thing is that you can use low ISO, this picture have 400 in ISO.
When you have low ISO numbers the picture will not have so much of the grainy touch to it, which is good. If you want to have a clear picture, then keep the ISO low. This kind of photography technique takes lots of patient to get it right. You have to try different shutter speeds till you find the right one for your picture.
This filter is really great, it works and it serves it’s purpose. It cost at the moment around 70-80 US dollars.
2016©ExpressivePhotos

Capture PRO – accessory for your camera
Gadget that can make life easier as a photographer


Imagine when you are hiking or walking in the forest and you don’t want to have the camera around your neck but still want to access it fast. Then a camera clip attached to your camera bag’s strap is a good thing to have. I have found one from peakdesign. It is called Capture PRO. You can have it on the belt around your waist or on your bag. You can have it horizontal or vertically. You put the red plate under your camera then you attached the rest on the straps of your camera bag.


It is easy to use and that is the most essential when it comes to camera clips. It has a red button that is the release button. You can also turn the top of the button to stop the plate from moving. There is another screw that can be turned to give more safety and locking it safe. The screws on the far end of the sides control the size of the gap so that you can attached it to a big/small bag strap.

Another good thing is that you can attached it to your tripod. It has a fast grip so you fast can put it on or take it off the tripod. Just release it by pushing the red button.


The picture above demonstrate how the camera will be attached to the bag. I even tried with my Tamron 150-600mm lens which is a huge lens. It still could hold that lens with a camera house. I would suggest to only have smaller lenses on the camera clip for your own safety and because you should avoid uneven and heavy weight on one side of your bag.
If you need to use two cameras and you want to switch fast between them then one you can have around your neck and one attached to the camera clip. That will make the photography process go fast. Otherwise you would have ot open your bag again just to take out the other camera. With the camera clip you can avoid wasting time and enjoy photography.

The cost for the Capture PRO is at the moment around 61 US dollar. I got a good offer from a online site so I bought two. One for me and one as a gift.
To see a video clip of how to use it check it here. If you want to know more about Capture PRO from peakdesign press here. On their homepage they have a lot of other great inventions.
If you have any questions you can always leave a comment.
2015©Expressive Photos
Lowepro Format 150 – a small bag
Looking for a small bag to fit your camera gears?
I needed a smaller bag for my vacation when I travel. Since I only needed to fit a camera house and 2 lenses I found Lowepro Format 150 bag to fit my purpose. On the front of the bag there is a little pocket where you can have extra batteries, memory cards and pens, etc. There is one pocket on each side of the bag for a tripod or bottles. There is no rain cover for this bag which is to bad because its a great bag otherwise. It weighs basically nothing only 0.5 kg.

I also tried to fit my big Tamron 150-600 mm lens in the bag and I could fit it too. See picture below to see how it looked. On the inside of the lid there is also a pocket for a 10″ tablet (Ipad etc). The bag can fit 5 small lenses and a camera house. To the left of the camera house you can see that the padding is divided to make it easier to have a lens attached with a camera house, that is a plus.

I have put the Lowepro Format 150 next to my usual bag the Lowepro 300 AW, so that you can have something to compare with.


All in all it is a great bag for travel. I used it for my vacation in Europe. I could pack it with all that I needed for my travels to different places. It will be the bag I am going to use if I am going out to take some pictures, especially for macro photography where I do not need any big lenses.
2015©Expressive Photos
Think Tank – Glass Taxi bag
I was looking for a small bag to fit the Tamron 150-600mm mounted to my Canon 60D. I had seen the review with Jared Polin for this bag. He was able to put in lots of pro lenses in that small bag. He was very surprised by how good the bag was and was saying it was light weight. So I thought I have to try the bag to see what the fuss is all about.
I was checking it out in the store and I also had my camera and the Tamron 150-600 mm lens with me to try it out.
First thoughts of this bag was that the lens and the camera fits in the bag! That is a good start.

When the padding came into the picture, the issue started. The shop keeper and I tried to build it up so that you would be able to fit the camera house mounted on the big Tamron 150-600 lens and still have some lenses on the side of the big lens. That was not easy.

The good thing about Glass Taxi bag is that it has a option where you can choose to only have a big lens in the middle of the bag but then there will be no space for any other lenses. See the picture above to understand what I mean.

As you can see from the picture above you can fit lenses on the side if the big lens is straight. The problem with the Tamron 150-600 mm lens is that it is not straight and that makes it little harder to fit in this bag. The Tamron lens becomes wider in the end of the lens. That puts the camera house in a strange angle in the bag and the padding does not fit then. I am not saying it wont go, but I am saying that the camera bag is not built for the Tamron 150-600m mounted on a camera house.
This is what you can use the bag for:
- Holds up to a 500mm f/4 lens.
- Holds a 300mm f/2.8 with DSLR
- Holds a pro DSLR

Technical Specifications:
- Interior Dimensions: 8.3” W x 16.3” H x 8” D (21.1 x 41.4 x 20.3 cm)
- Exterior Dimensions: 8.5” W x 17” H x 9.5” D (21.6 x 43.2 x 24.1 cm)
- Weight: 2–3.7 lbs (0.9–1.7 kg)


Glass Taxi can be used as a backpack or a shoulder bag. You can attached a monopod or a middle size tripod on the side of the bag. With the speed/skin belt you can attached even more components on the belt, if you want that.
Another thing I noticed with the Think Tank Glass Taxi bag is that the side of the bags are very thin. This means if you happen to drop the bag your lenses and camera equipment can take damage. That is the reason I did not buy the bag. To bad Think Tank, other wise it would have been a nice bag. I am not willing to take a risk with this bag.
It does not matter that the padding in the middle on the inside of the bag is thick because there are no padding on the sides of the bag. This is something Jared Polin forgot to mention when he did his review and praised this bag.
A good advice is to always try out the bag in a store before you buy it. If you order the bag online you will not notice these things until you open the bag and then it might be to big of a hassle to send it back.
The price is right now around 159 US dollars. The pictures are from Think Tank’s site.
©2014
Bag for Tamron 150-600mm
I have found the bag that fits Tamron 150-600 mm with additional lenses and the camera house. The bag is called Lowepro Pro Runner 300 AW.

I wanted the following features when I was searching for a camera bag;
– fit Tamron 150-600 mm lens attached to the camera house
– not to big bag
– fit few more things in the bag than just the Tamron and the camera house
– inbuilt waterproof material
– be able to have a tripod attached to the bag
– well protected
Finally I found the Lowepro Pro Runner 300 AW that fulfilled all the features I wanted.


These are the technical specifications:
Internal Dimensions: 28.5 x 11.5 x 38.5 cm (11.22 x 4.53 x 15.16 in)
External Dimensions: 33 x 19 x 44 cm (12.99 x 7.48 x 17.32 in)
Weight: 1.4 kg (3.08 lbs)


As you can see from the above pictures I can fit the camera house on the Tamron 150-600 lens with the hood. I can also fit 4 other lenses and a flash. If I remove the 2 last walls that is below the Tamron 150-600 mm lens I can fit even longer lenses in this bag. So it is a bag that can be used for many kinds of lenses. When I am outdoors and I want to take the camera house and the attached Tamron 150-600mm I can easily do this with this bag.
The bag comes with a inbuilt raincoat and it has a tripod pouch at the bottom of the bag to put the tripod and then attach it to the bag on the top as well.


I will write more about the alternative bags that can be useful for Tamron 150-600 mm or any other similar size lens in another article. In that case you have more bags to choose from. If you have any questions about this bag just ask.
2014©ExpressivePhotos


