Tips for bird photography
So you want to challenge yourself with bird photography? Good choice! I love bird photography bacause it is a challenge that takes patients and endurance. With a bit of practice you might come close to the birds and take nice close-ups, without disturbing the birds of course.
Here is my best tips when it comes to bird photography:

I wish you all the best on your new adventures!


Expressive Photos©2023

Canon R6 Mark II
I bought a new camera and its Canon R6 Mark II. All I can say is WOW its a big difference from my old camera, Canon D6. Canon R6 mark II is a fast camera, it can take 40 pictures per second. Its great for sport and bird photography.
When I was going to buy a new camera it was a choice between Canon R6 and Canon R5. I had heard good reviews about R5 and its a great professional camera. The Canon staff told that it’s better to go with Canon R6 Mark II for the purpose of bird photography plus its little bit cheaper and the software in the canon R6 has newer features. It has inbuilt stabilizer, so even if you have a lens that doesn’t have stabilization the camera compensates for that. So that you get nice and steady pictures.
Im really happy that I got this camera. So far I have used it for sport and dance events and bird photography. I have also tried out some street phogotgraphy. Im happy with the result. I will show you some examples.


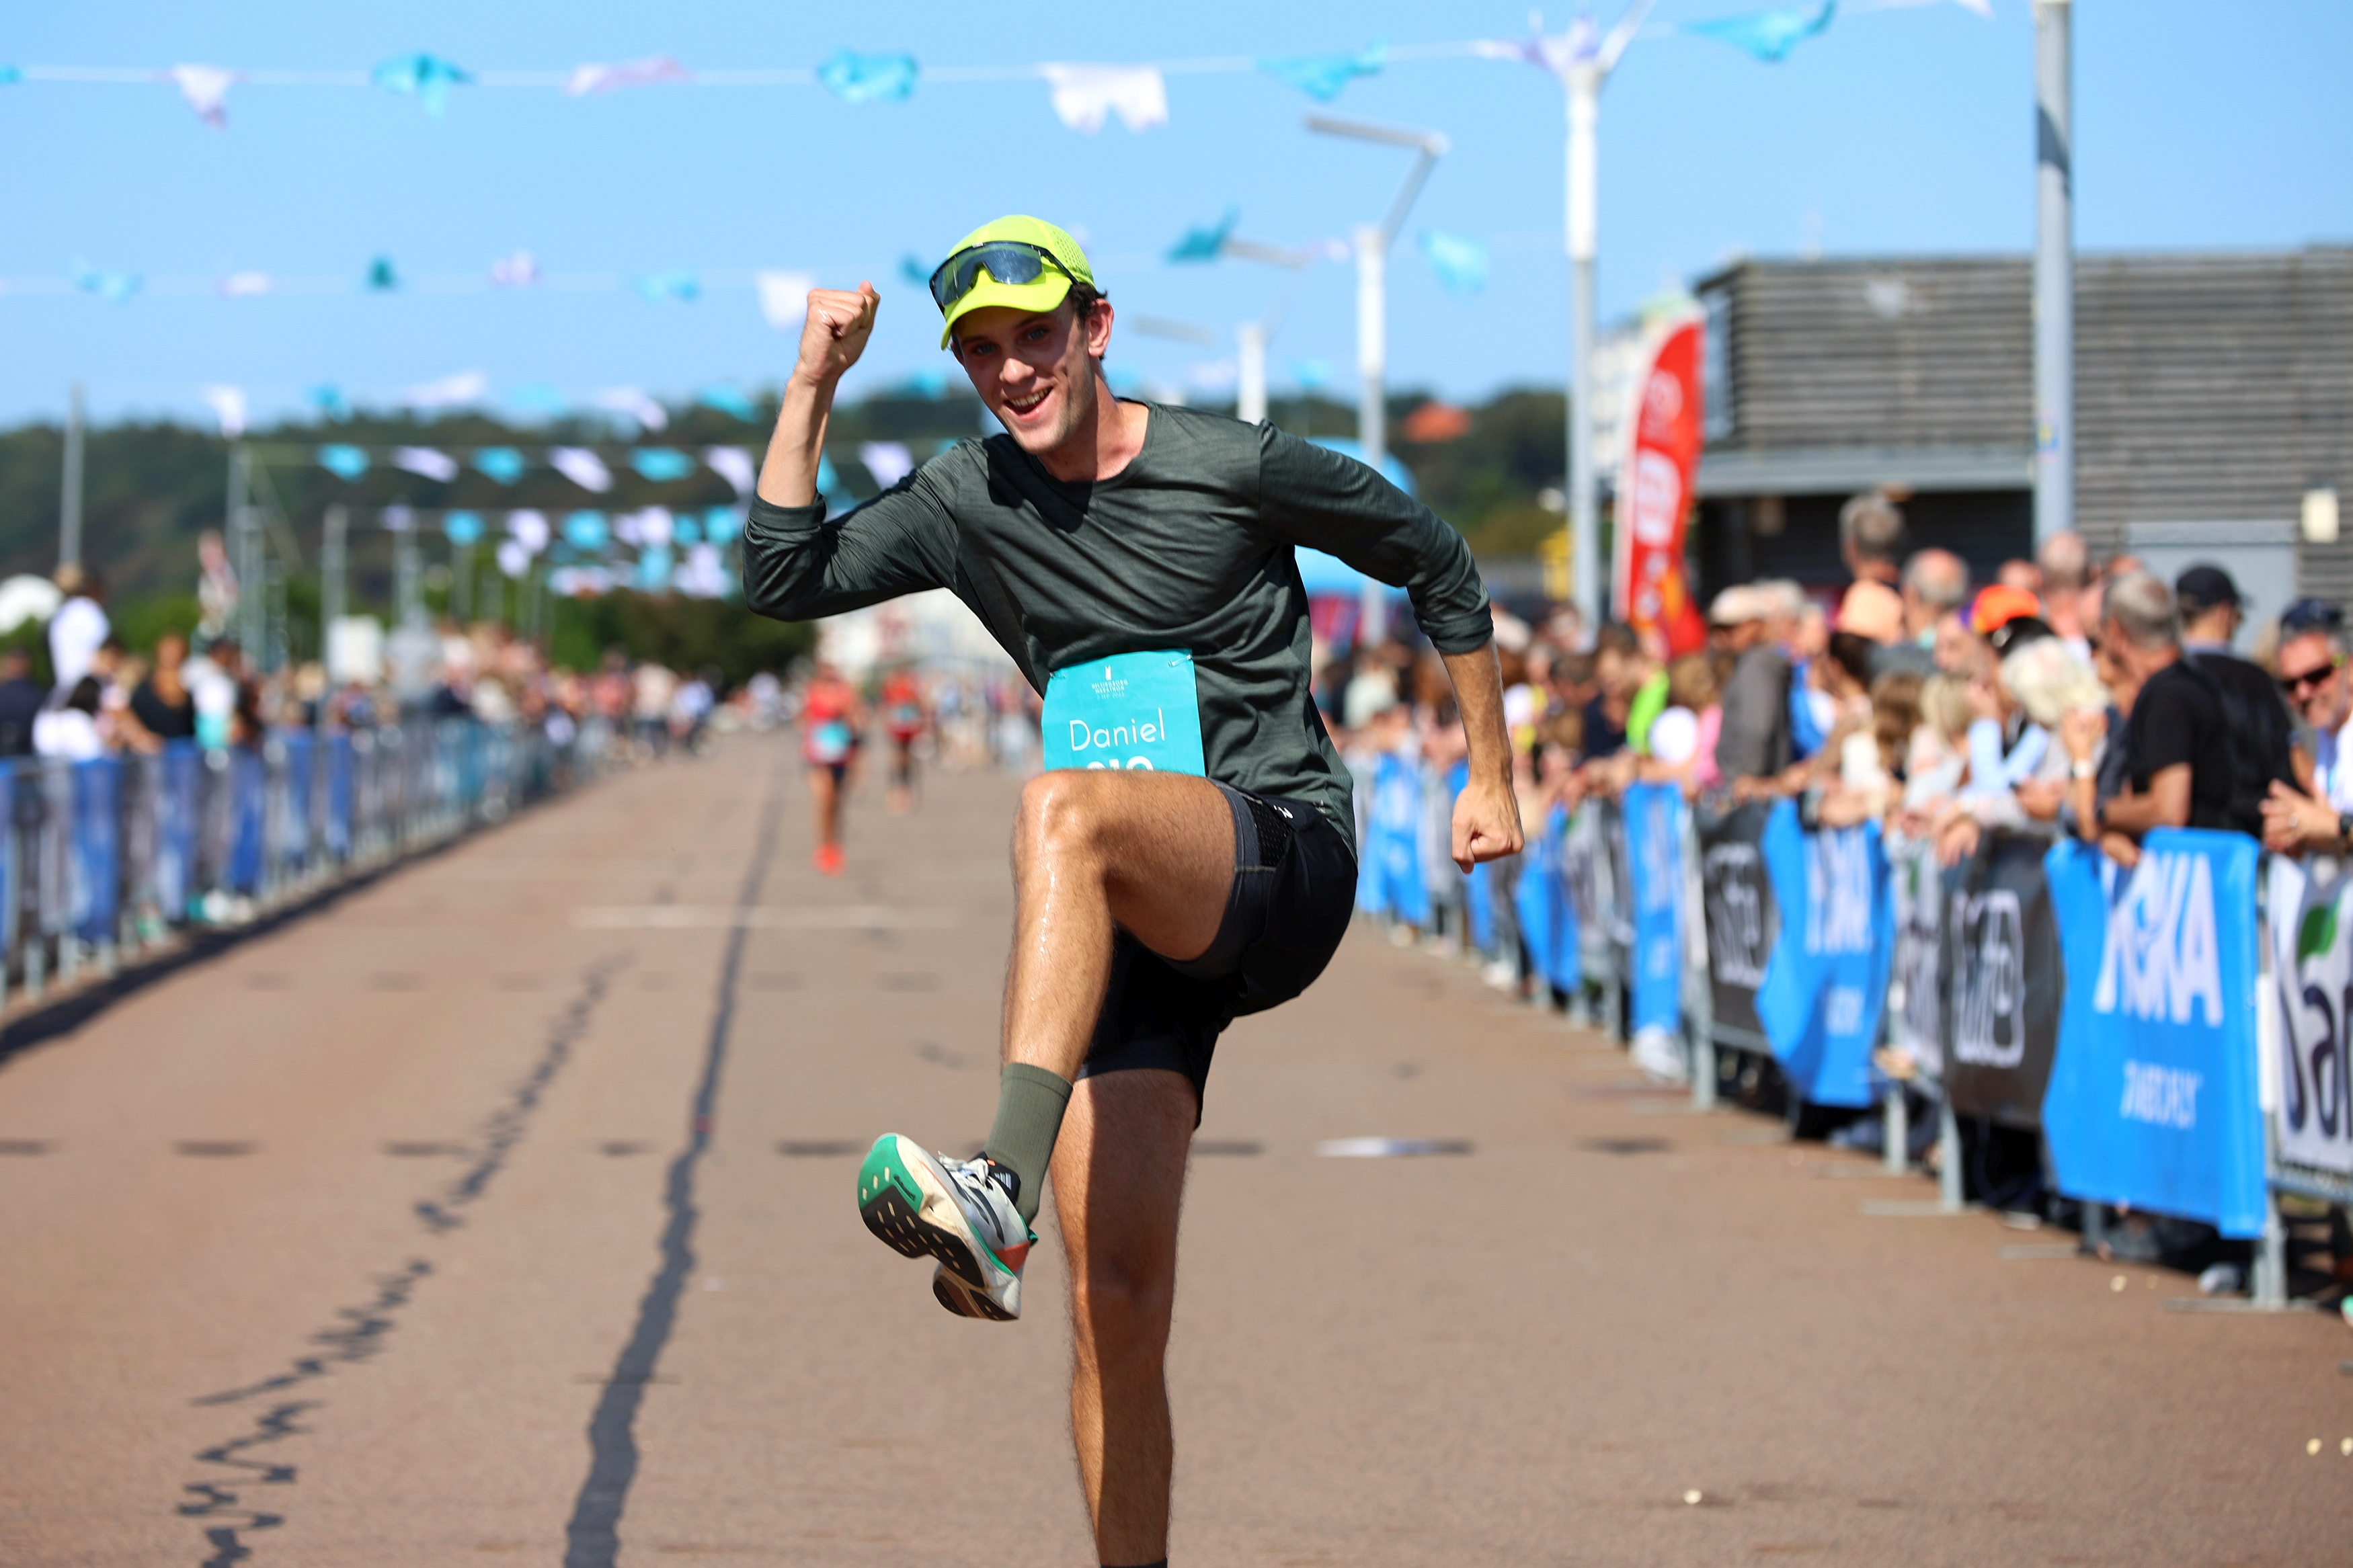
I was the offical photographer at Helsingborg Marathon in Sweden in september 2023. These are some pictures taken with Canon R6 Mark II and a mount adapter with Canon 70-200 Mark II 2,8f.


The pictures are nice and clear it was easy to use the camera and it helps that it takes many pictures per second when the runners are super fast or when there are many runners in a group.


I also took pictures for a Indian dance group in Sweden called Nritya Nadi. They are professional dancers and it was a pleasure for me to be taking picture of them with all their unique expressions. I was using sports mode and the face detection.
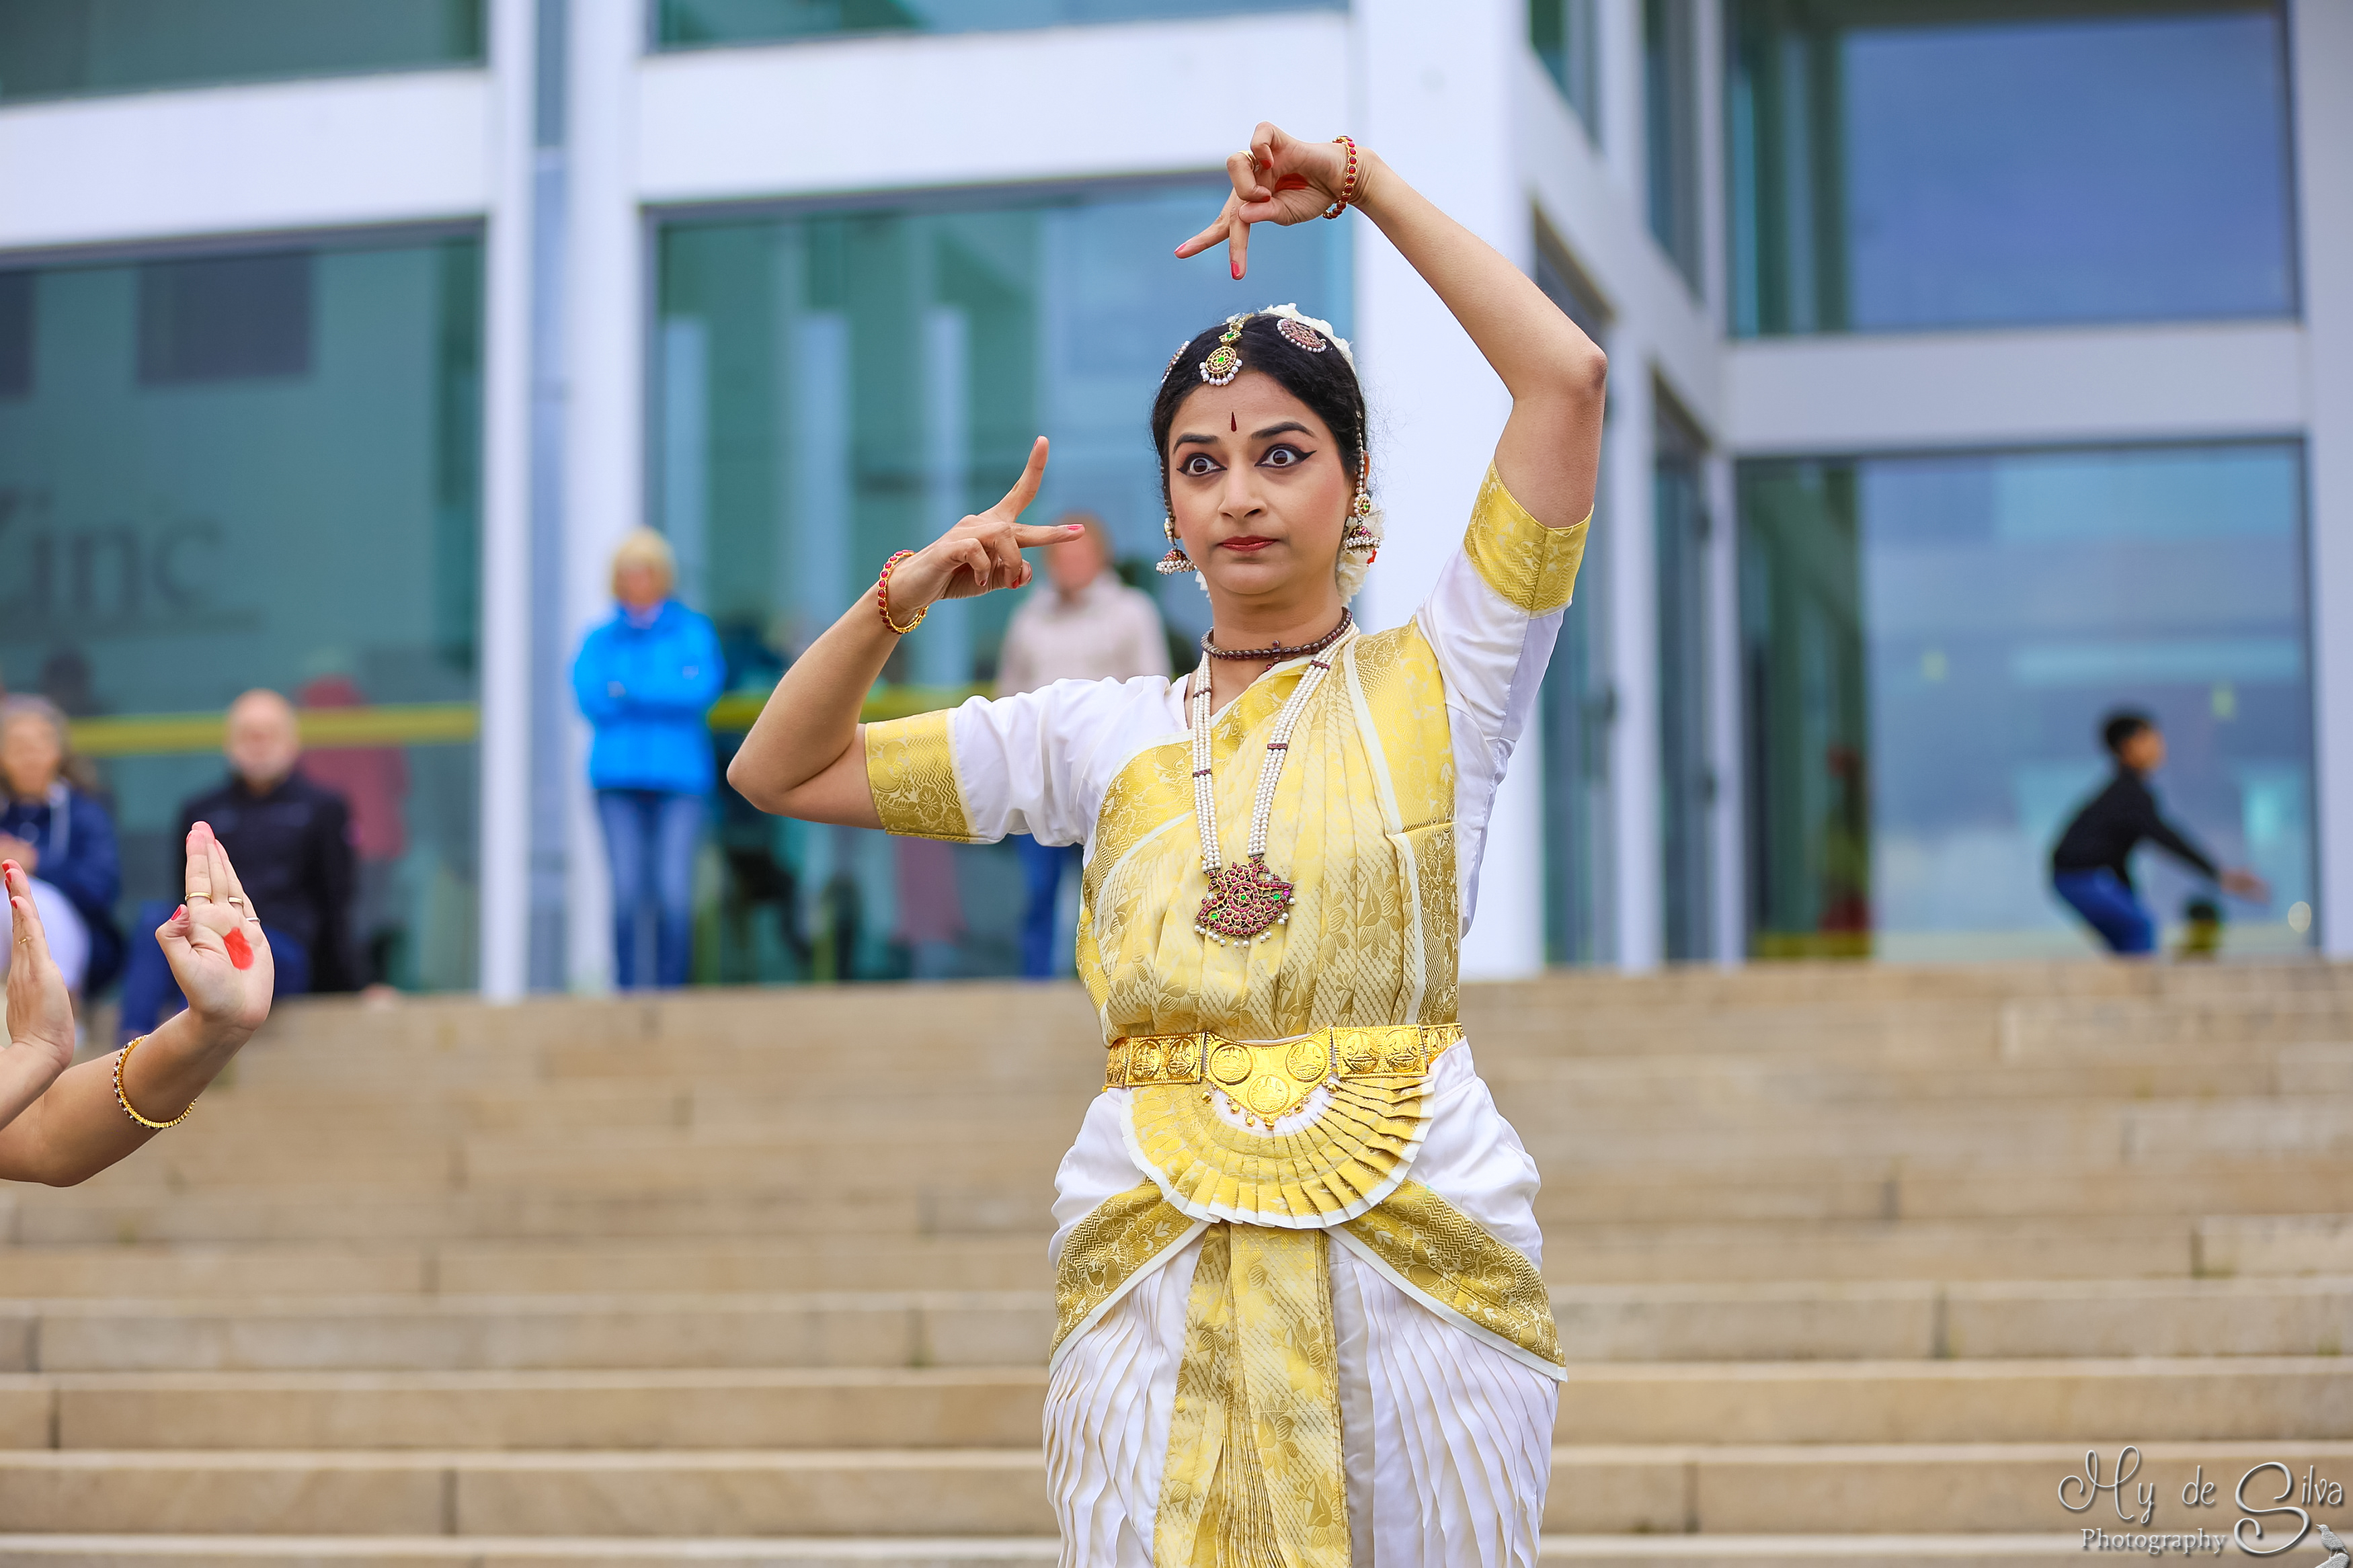
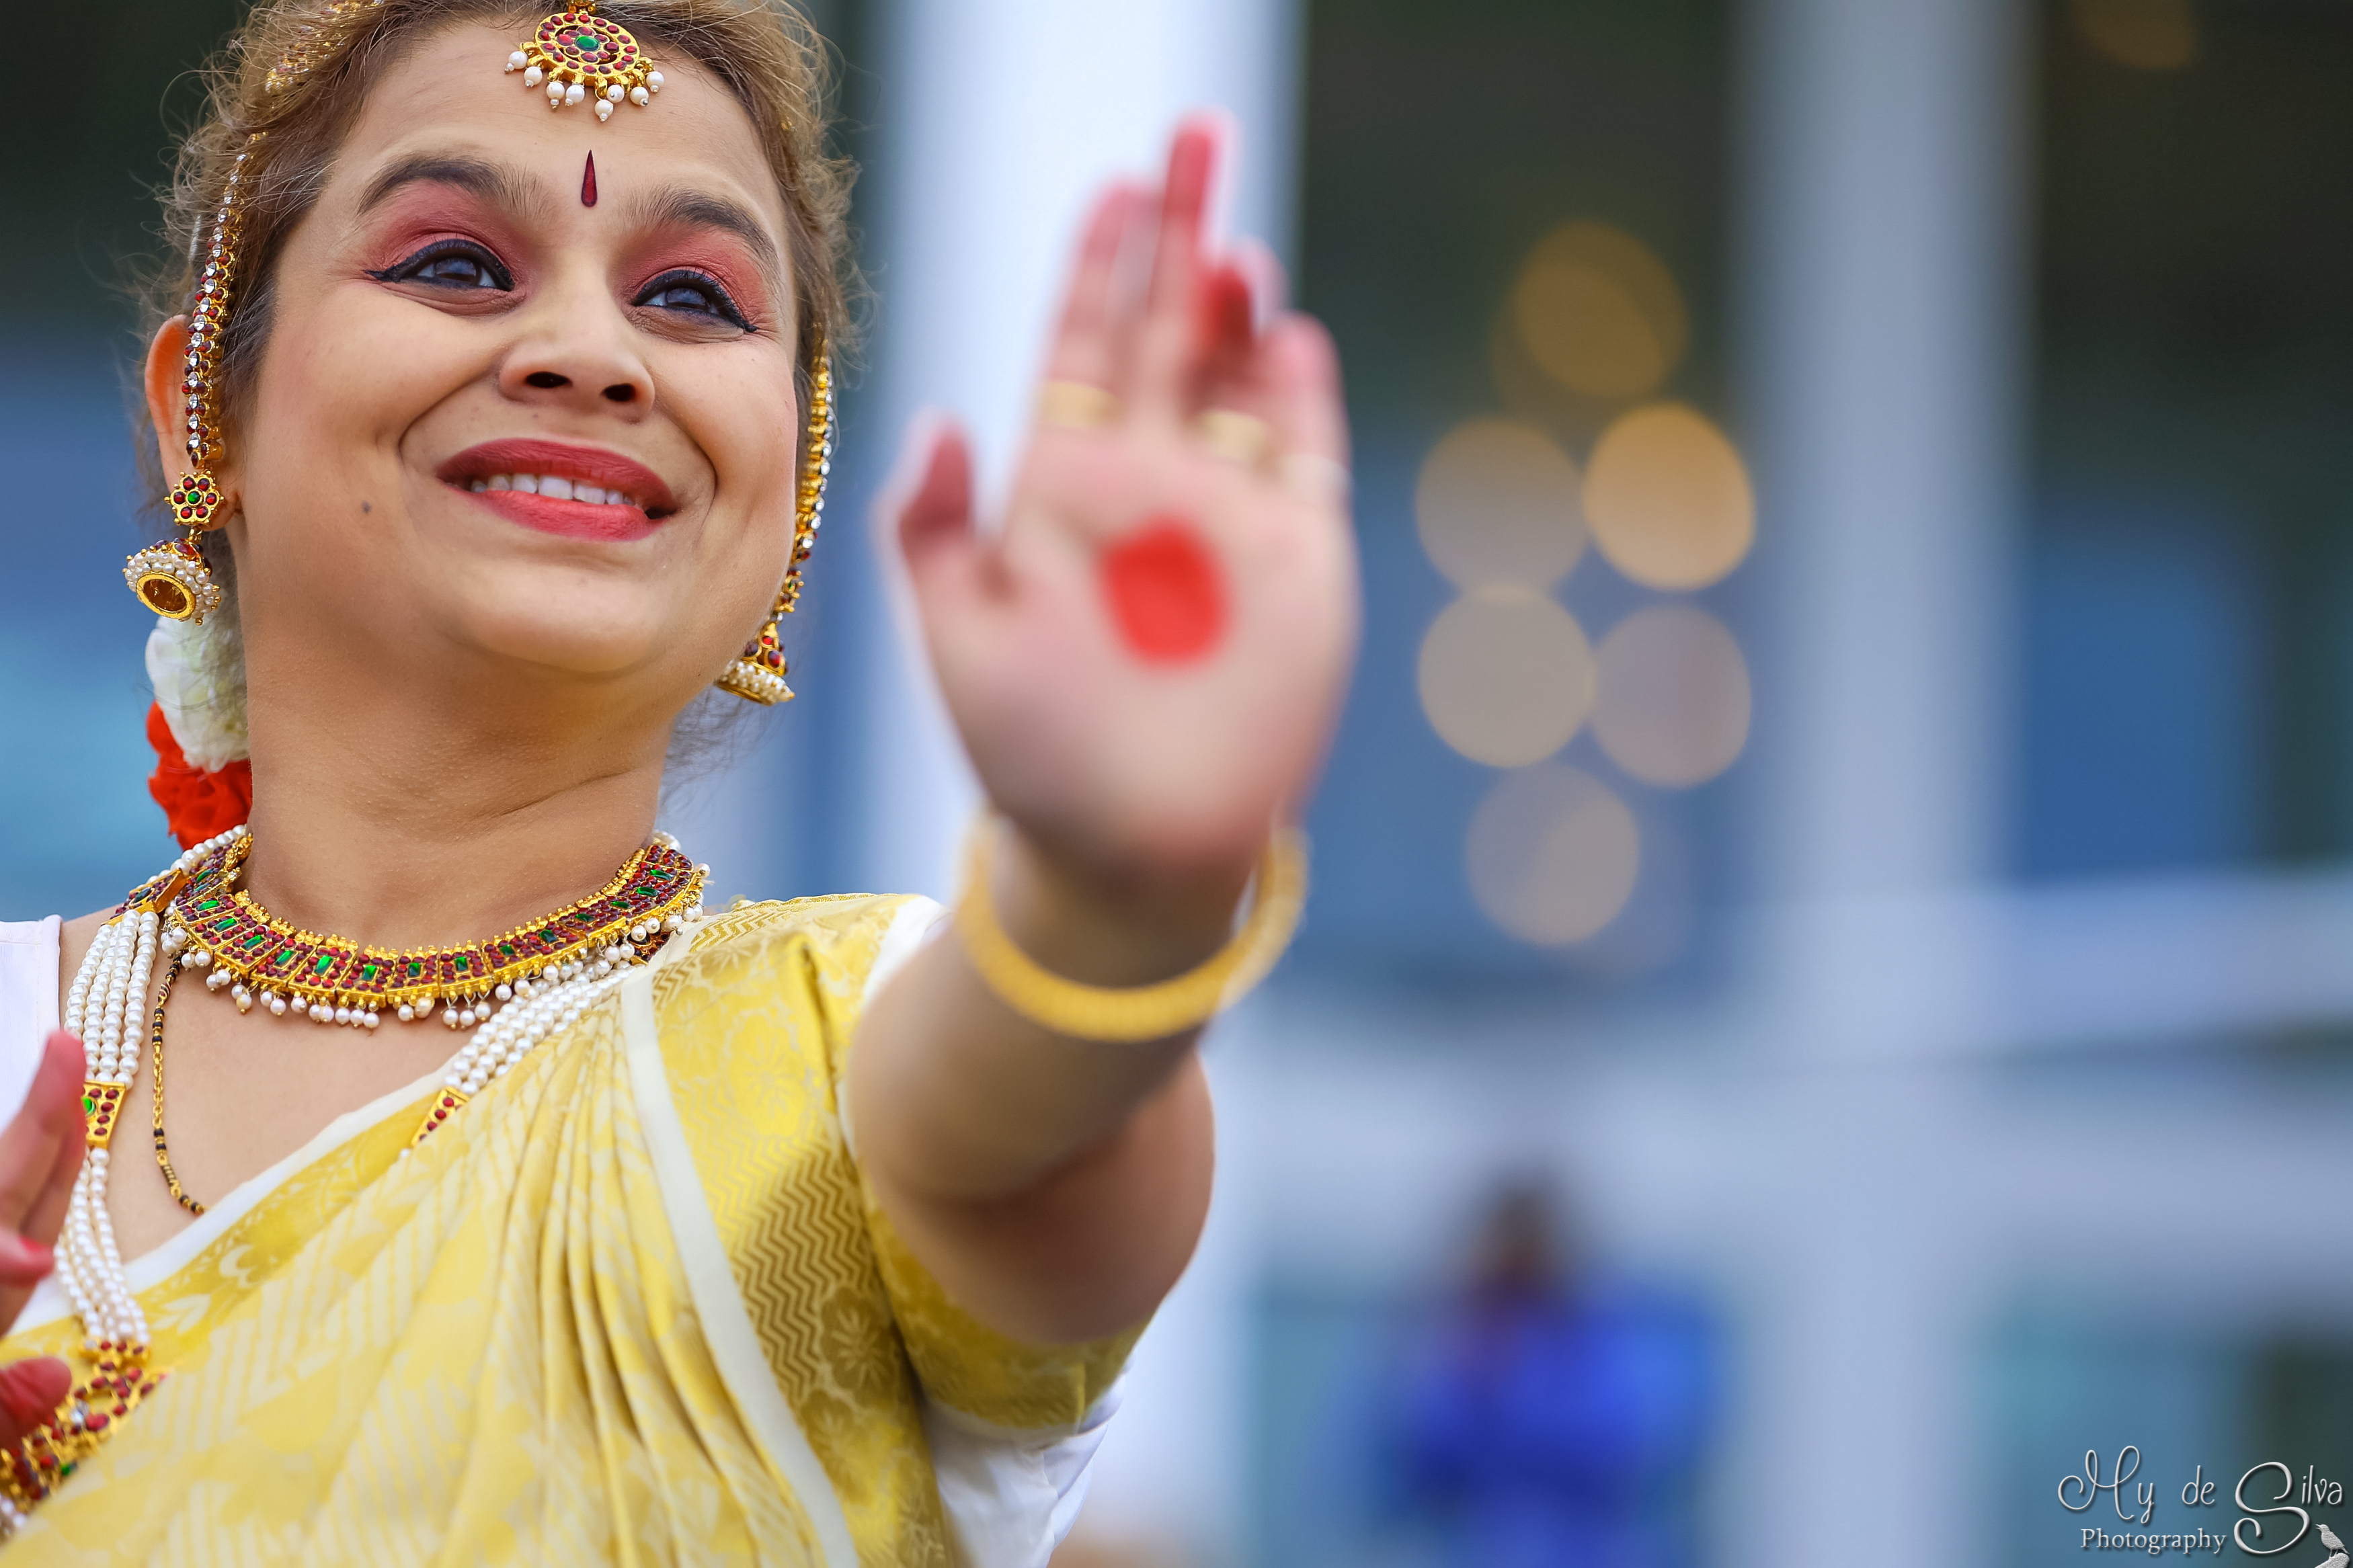

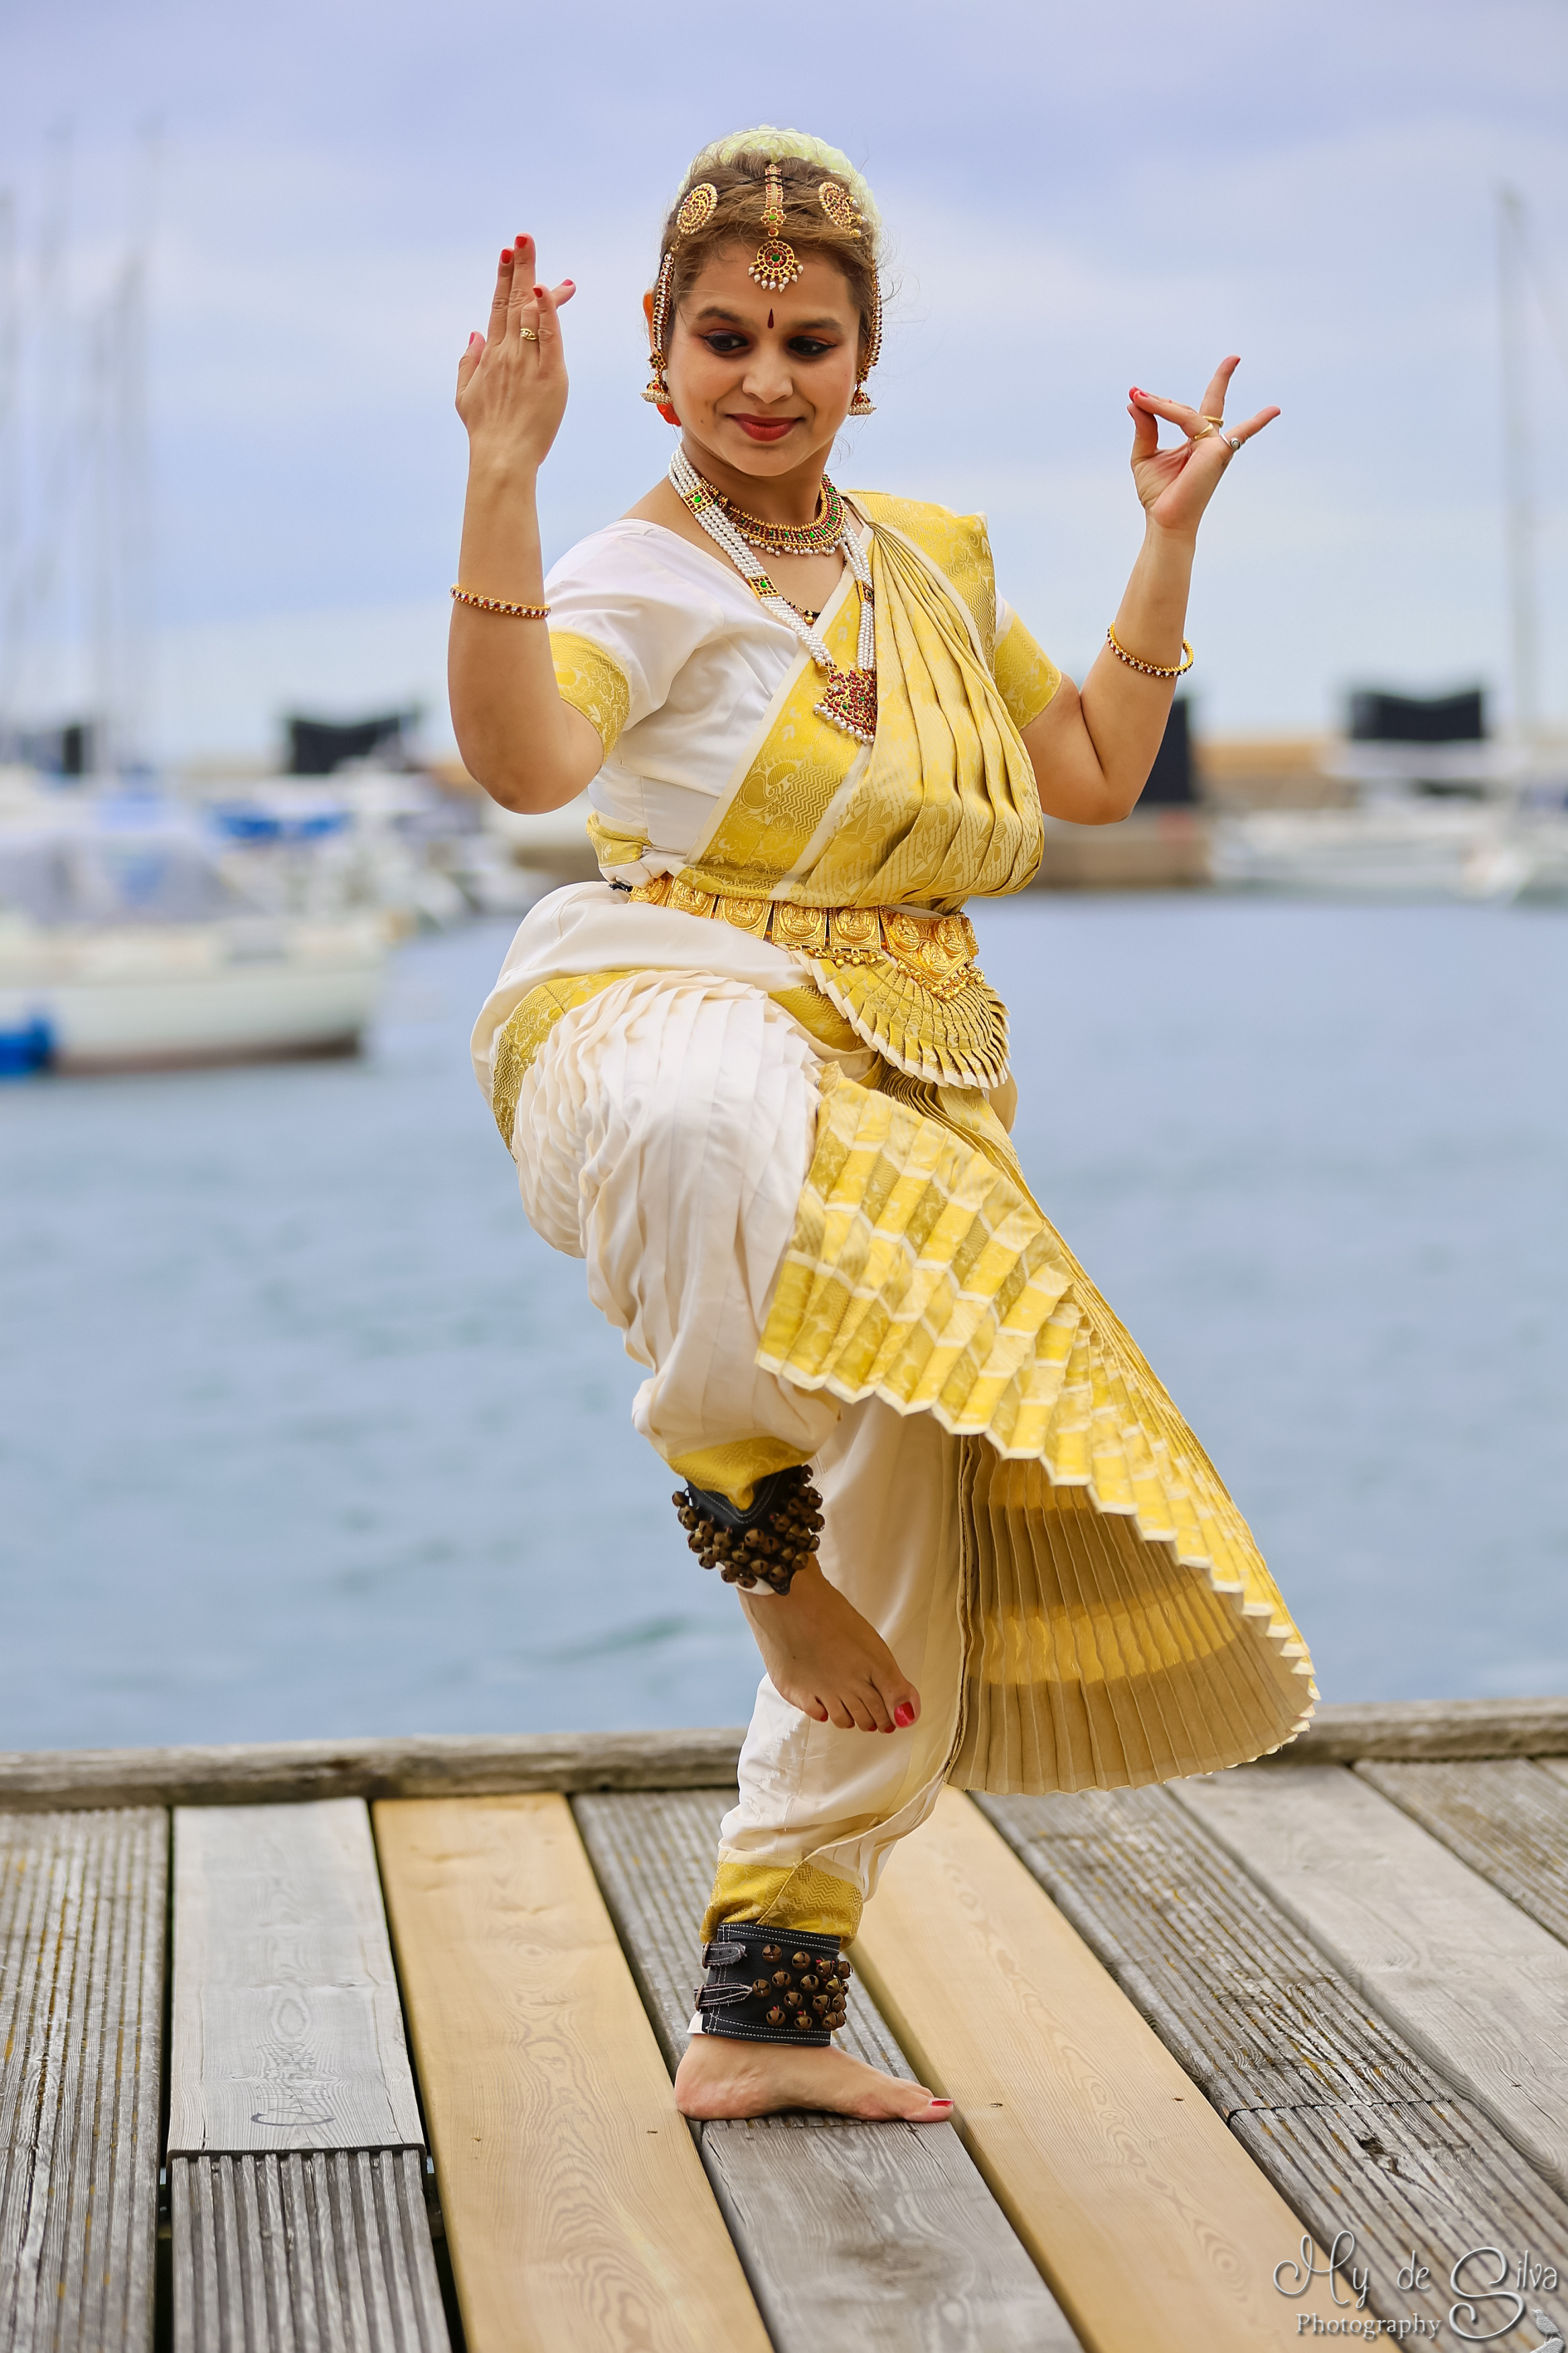

Expressive photos©2023

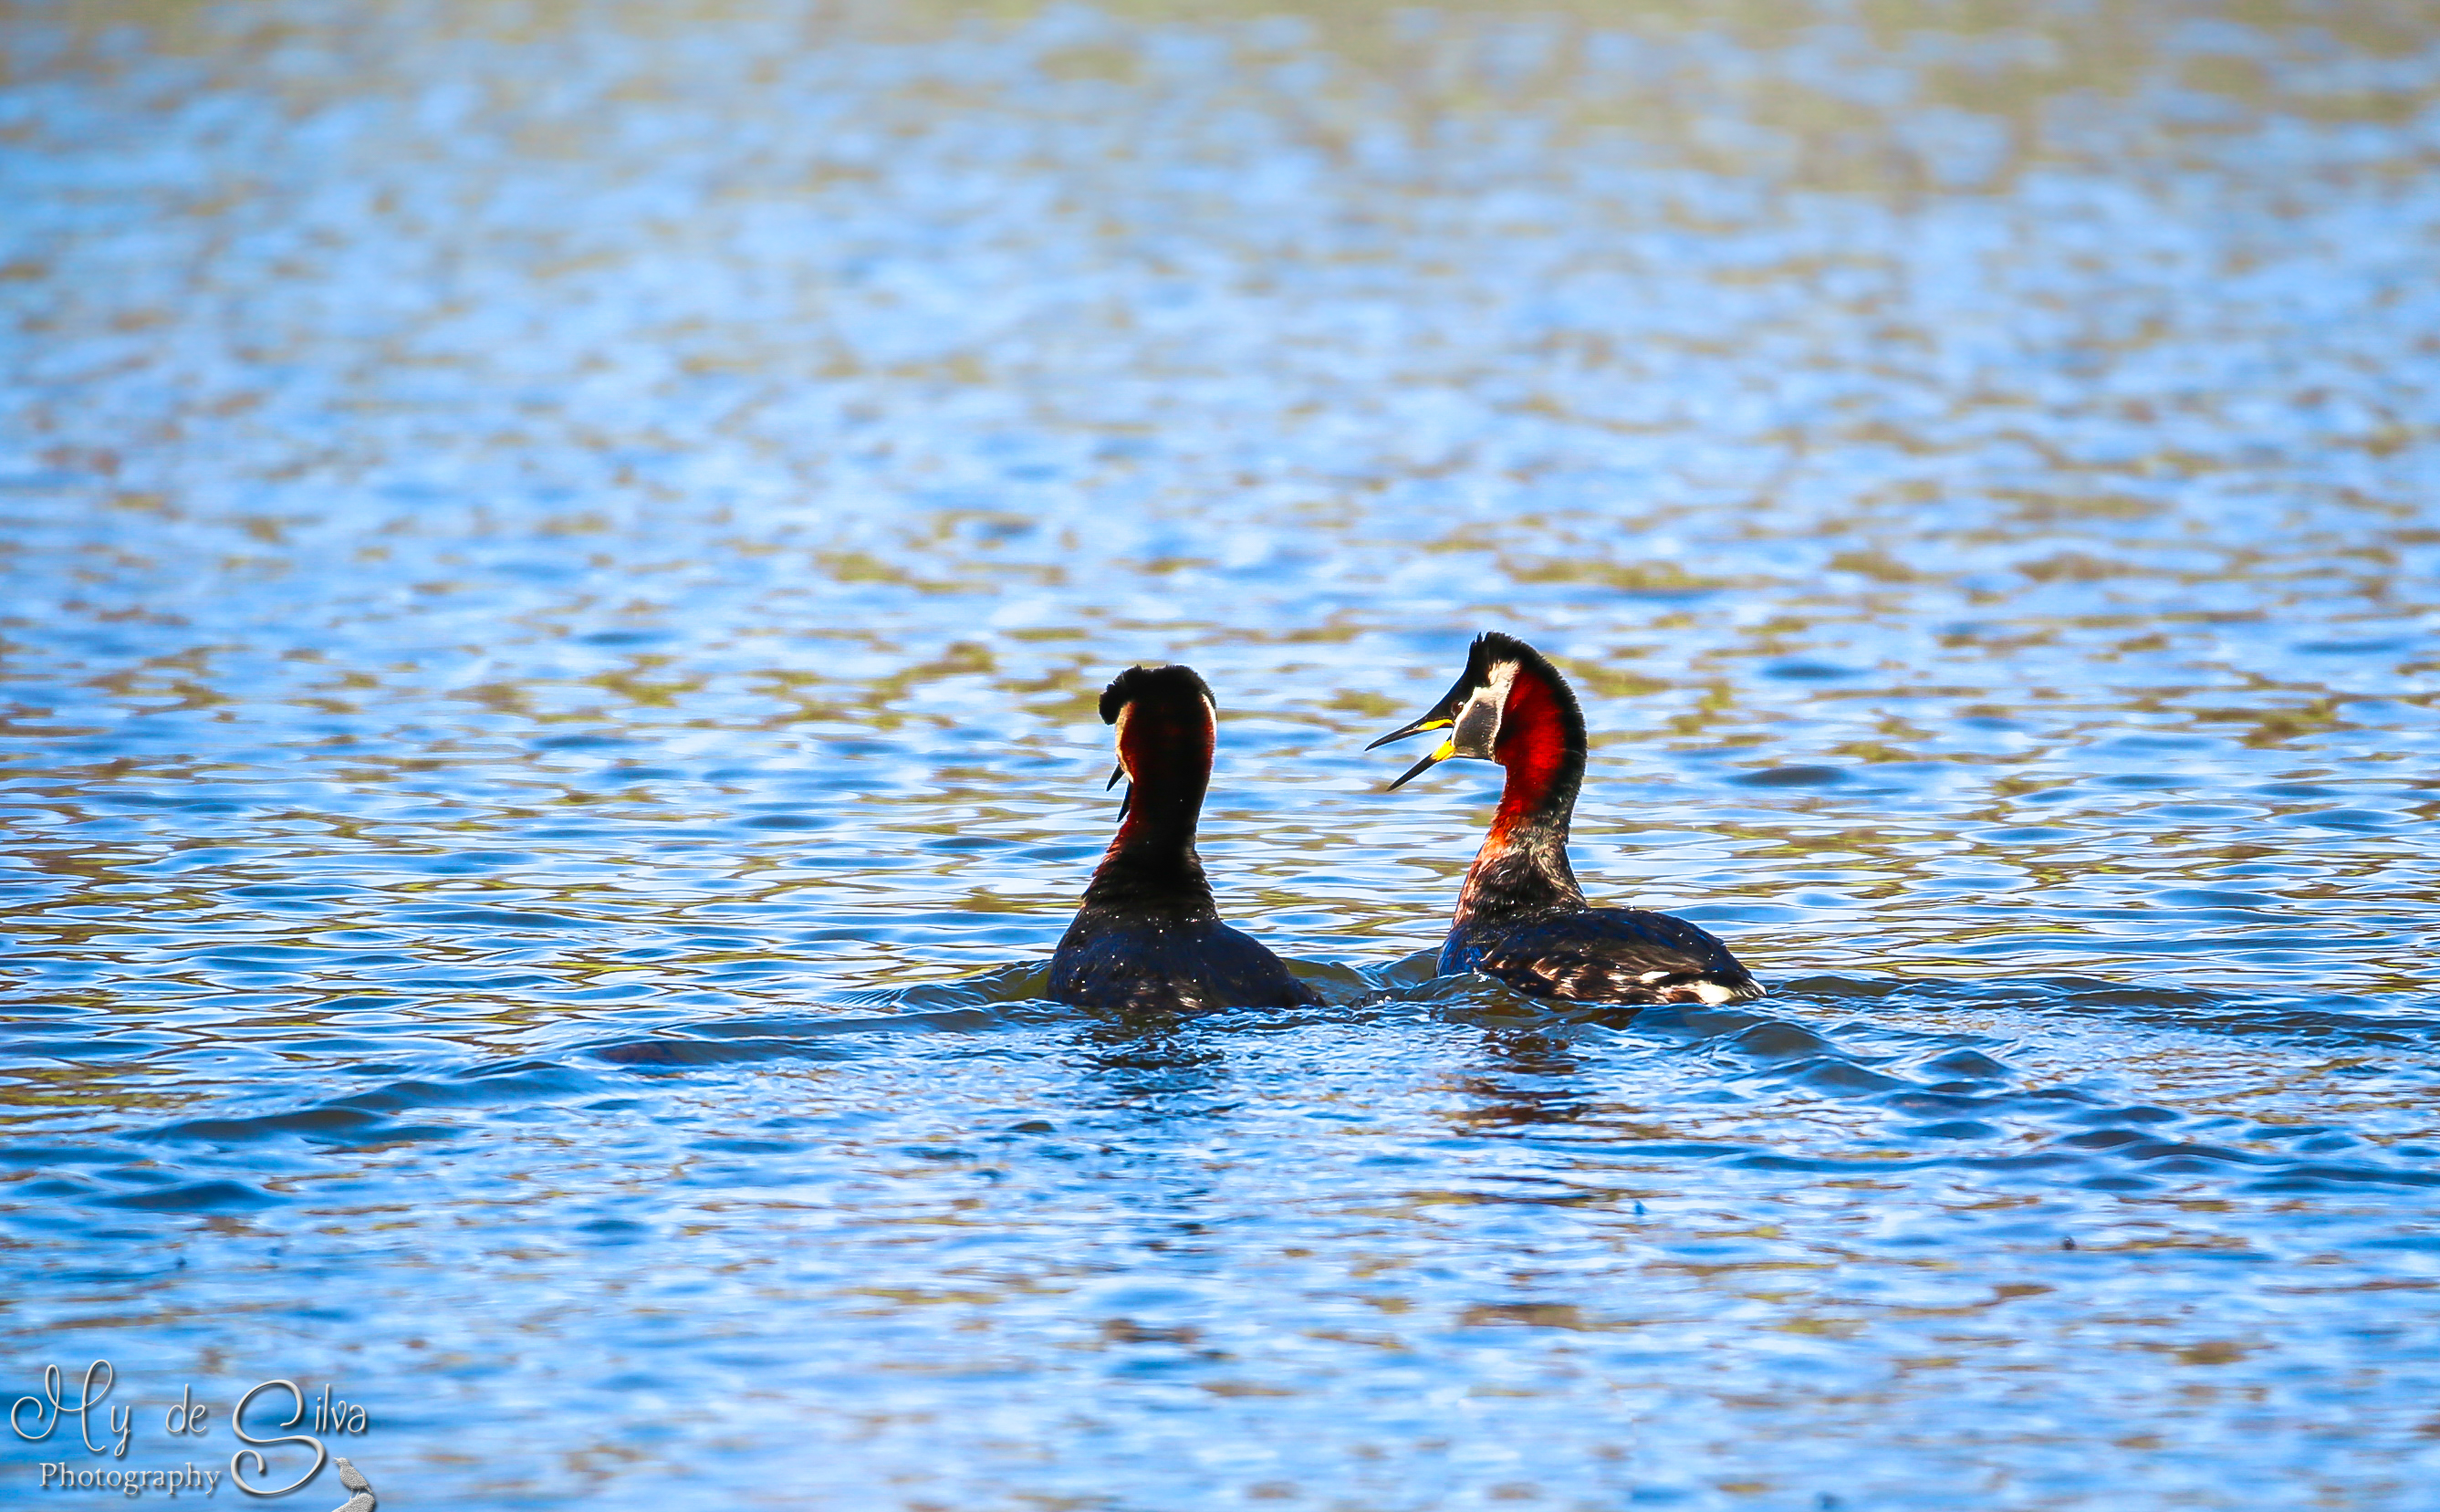
It is time for some close-ups of birds
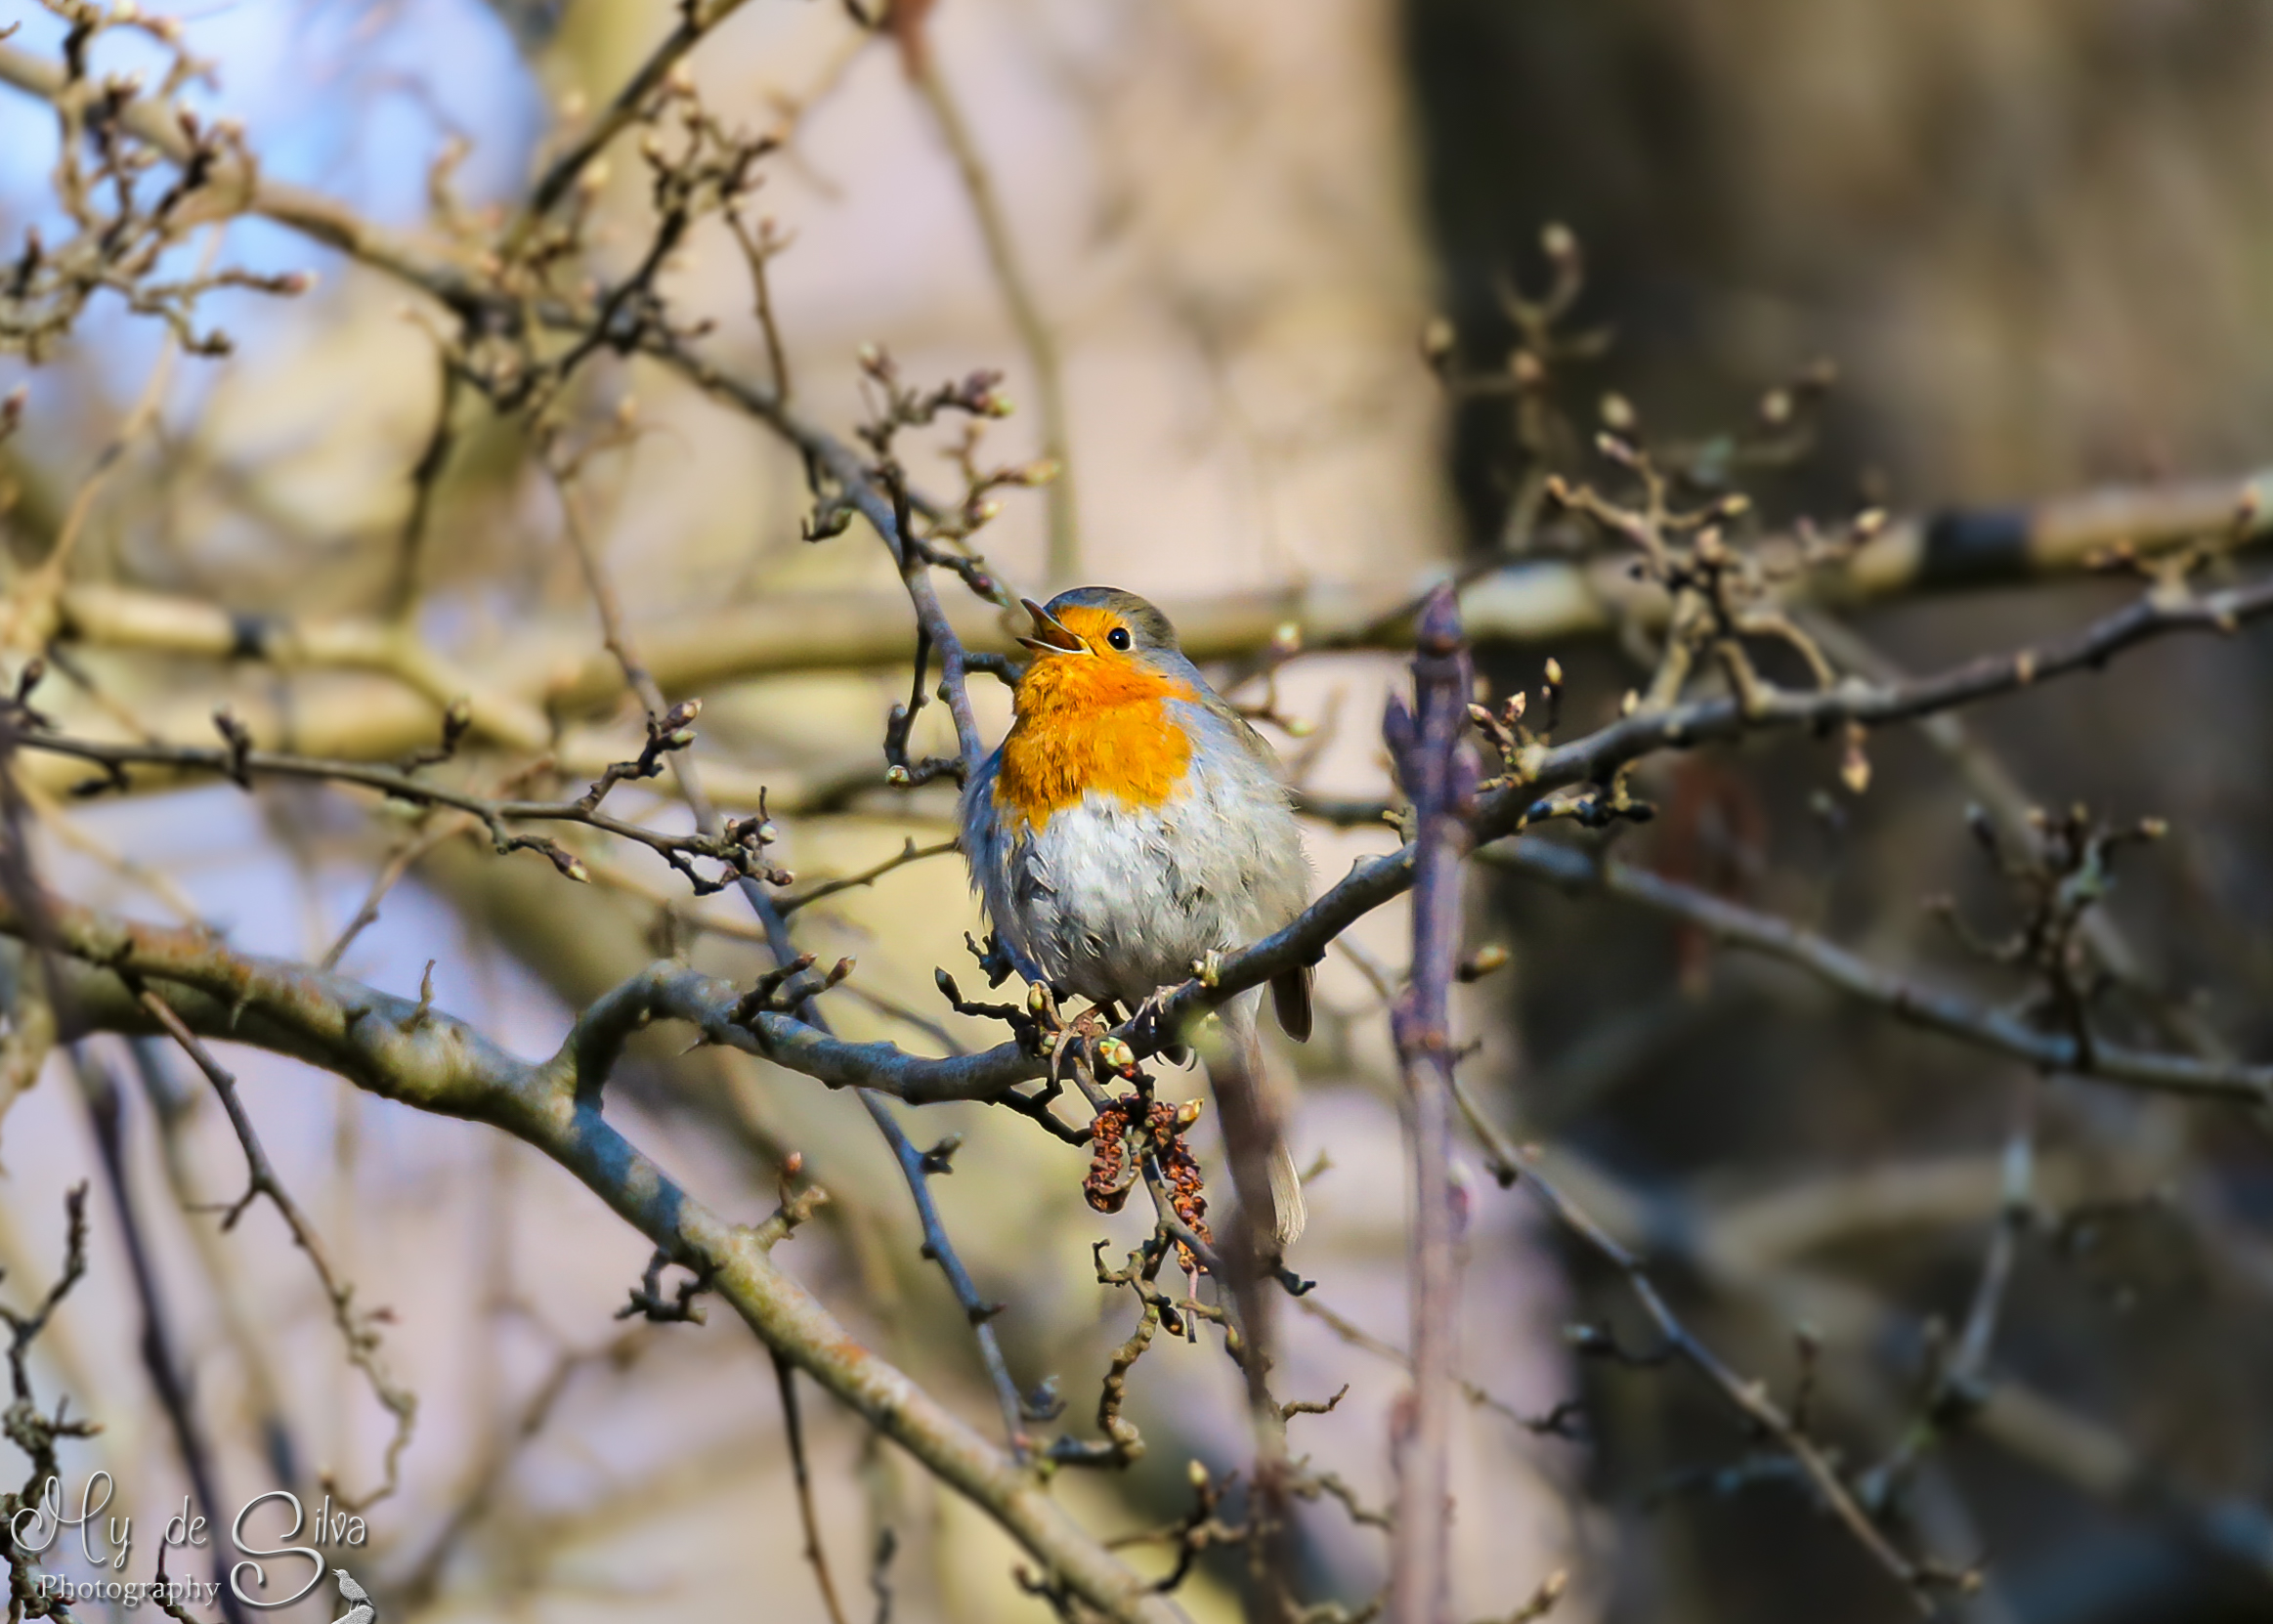
When spring is here and the birds starts to come back, it is the perfect opportunity to take pictures of them. It is not always easy to get close to birds so it is of importance to use a lens that can get a close-up. I recommend lenses that are 400mm or above. I have used Canon 6D and Tamron 150-600mm lens for these pictures. The pictures are all taken from my car. When you take pictures from the car remember that the vibrations from the car can effect your picture (depending of the quality of your camera equipment) so make sure to turn of your car while taking the pictures.


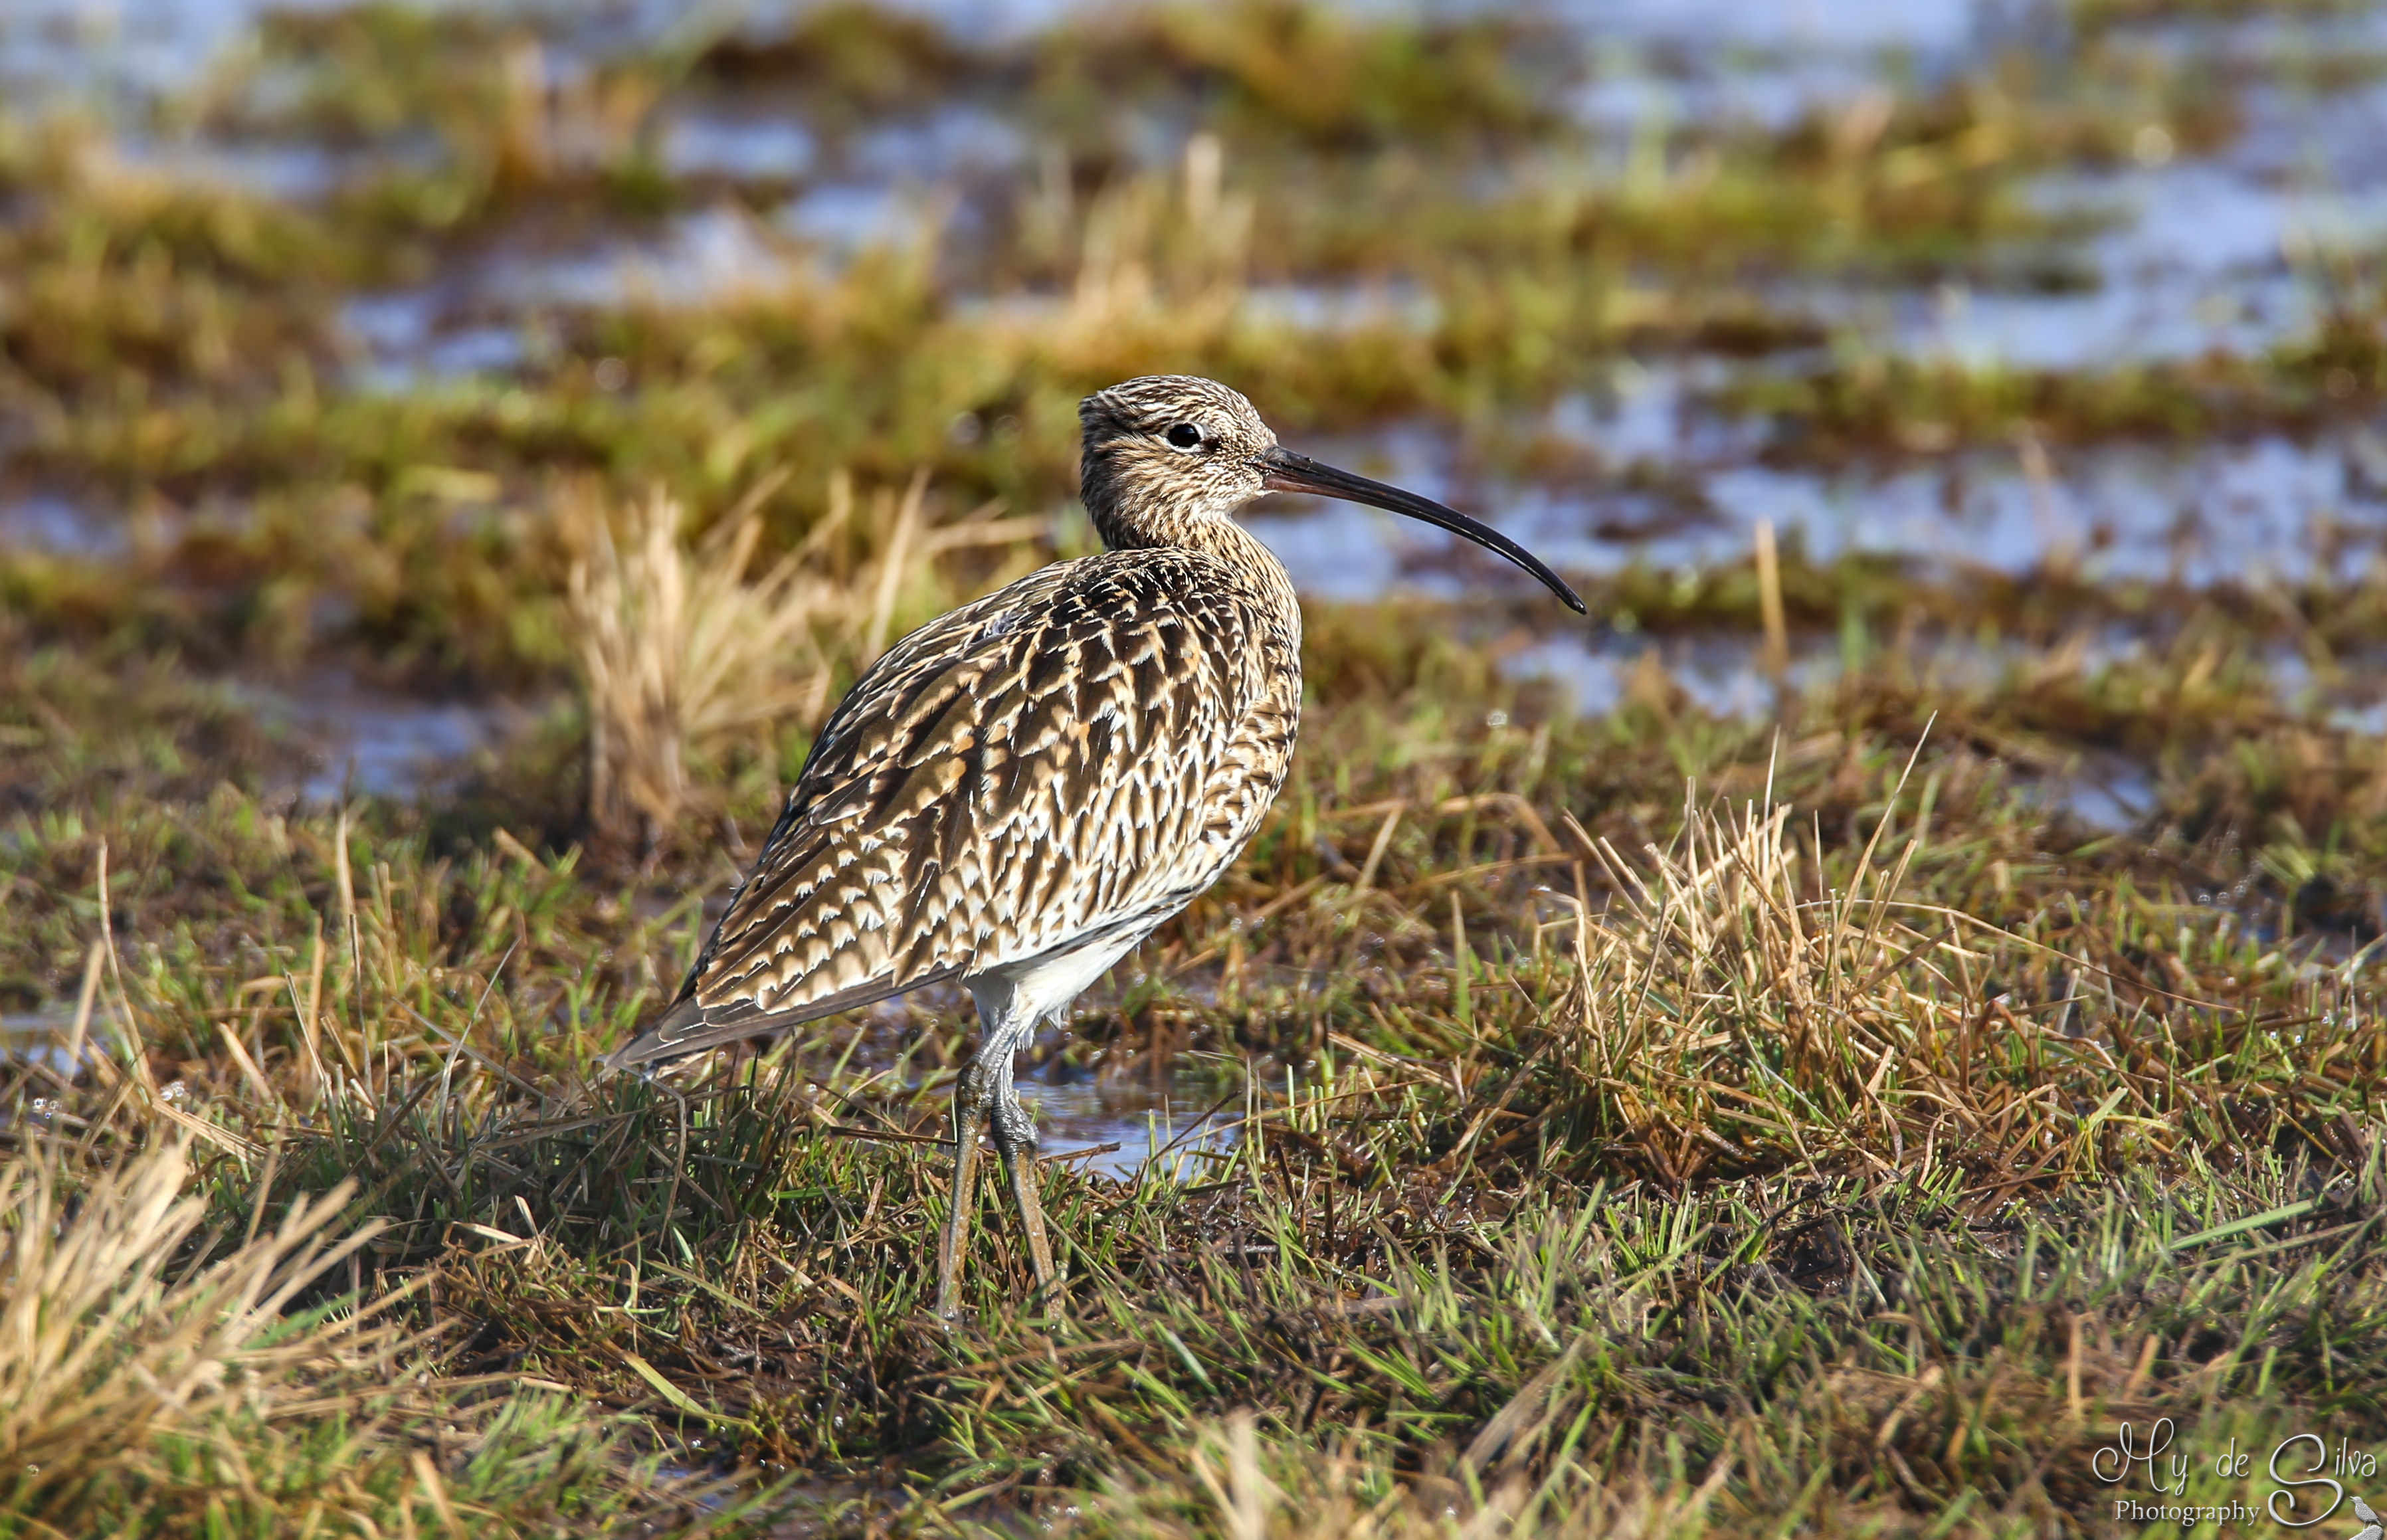
2022©ExpressivePhotos
Rainy days
When it rains the thought of going out and taking pictures might not be on the top of the list. Although I feel it is the perfect time to take pictures. Especially when you can sit indoors by the window and just click some pics of birds in the trees. That is the most convenient thing to do.
I was lucky to have a nice garden right outside my window on my vacation. So I would just wait for birds to come to me. Here are some pics I took with the combo of Canon 6D and Tamron 150-600 mm lens.


The above pictures are showing a Purple-rumped Sunbird from India. It just landed on some leaves right in front of the window. It was busy catching a white spider that was hiding between the leaves. When I took the picture I could not see what it was searching for but looking closely at the picture it cached a pretty good meal.
A simple picture of a crow gets more effect when the rain pours down. It is like you can almost feel the silence and sound of the raindrops touching the leaves of the tree.

So lets not be discourage just because it rains. Enjoy and be creative!
2017©ExpressivePhotos.net

Reflections – Bird pictures with Tamron150-600mm
I was walking in the park and I sat down at a bench to just enjoy the sunny weather and to have a bit of break. I turned around to check out the little lake that was behind me. There I saw a little bird that came very close to where I was sitting.
I took up my camera and aimed. I was using Canon 70D and the lens was a Tamron 150-600 mm version 1. I got the following pics of the bird called Wagtail.


As I continued sitting on the bench and relaxing there came other birds that wanted to drink the water. So I felt I was lucky that the birds were coming to my spot instead of me trying to come to theirs.
I call this segment reflections since all the birds have a reflection in the water.

This bird is called a Fieldfare
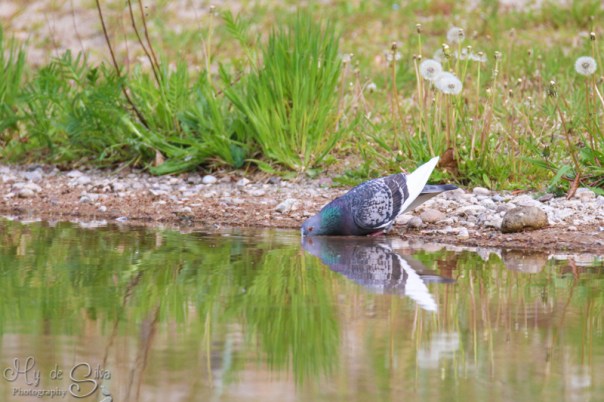
A pigeon also need some water
All of the pictures above are taken at 600 mm with a aperture of f8. The picture below is taken at 350 mm with a aperture of 7.1. The reson I mostly take at f8 is because in order to get pretty sharp pictures with Tamron 150-600 you need to be at this aperture.

Crow and its reflection
2017©Expressive Photos

Bird photography with Tamron 150-600mm
The most fun with bird photography is the challenge to get a photo of a very active bird. Small birds in particular have a hard time of staying in the same place for more than just few seconds. These pictures are taken with Canon 70D and Tamron 150-600mm. I like this lens a lot. Tamron 150-600 mm lens is cheap compare to the professional and expensive 600 mm lenses but still delivers some great shots. I will share some pictures I have taken with Tamron 150-600mm lens.

Reed Bunting (male)

Kestrel (male) searching for a bite to eat
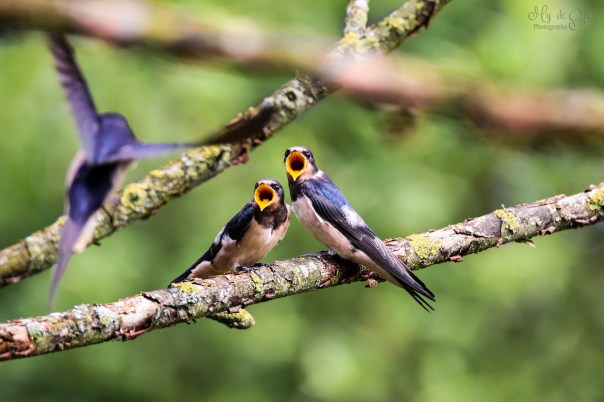
Swallows waiting to be fed
2017©Expressive Photos

Gimbal for bird photography – Beike-45
If you like wildlife photography and especially bird photography then eventually you might need a gimbal on your tripod.
The gimbal makes it easy to follow the bird when it flies by you. It is easy to use, it rotates the way I want it to. I can easily follow fast moving objects with this gimbal.
I can recommend Beike-45. Why?
Because it is great! It is also good value for your money. It only cost 70 US dollars nowadays. Normally similar kind of gimbals cost around 300-450 US dollars. I bought mine in 2015 at Aliexpress from China, then it cost me 78 US dollars. I got it delivered in 3 weeks. So if you are planning to go somewhere for wildlife photography order it in time for it to be delivered before you go on a trip.

I used to always have this Gimbal ready on my tripod when I was going somewhere for bird photography and I knew I would be there for a while. It is not that heavy to carry. It weighs around 1 kilo. On the above picture I have a Canon 70D and Tamron 150-600mm attached to the Gimbal. I dont have to worry that it might tip over, it is very stable and it is easy to rotate.

When you use a gimbal make sure that you have the level meter on your camera. Usually it will look like a red/green line that gives you direction on which way to turn to make the camera straight.

2017©Expressive Photos
Do not steal pictures from internet
Do not break the copyright law
It has come to my attention that some of the pictures I have on this site has been used for commercial purposes. If you steal a picture from the internet you are breaking the Copyright law. That can result in penalty and 2 years in prison. So think about that before you even think of copying/taking a picture from the internet.
It is always best to ask the person who have taken the picture for permission if you are going to use it for your own use, not commercial.
My pictures have been made into paintings, canvas, reprint and even coffee mugs etc. Lots of so called “artists” use picture they find online by searching for a animal and then steal that picture to make it part of their own “art”.
What should you do if someone steals your picture that you have put on the internet?
First of all, you have the law on your side if the picture is yours.
If you find someone is using your picture and selling it in some onlineshop then you need to contact that shop and tell them they are breaking the Copyright law and ask them to remove the picture. Usually this will help because none wants to break any laws if you are a shop owner. You just need to send a link to your page where the picture is to prove that you own the picture. Then it is also a good idea to give the link of the “art work” on their site so they can see the stolen picture that has been used.
How can you find out if someone is using your picture?
One easy way is to use google image search. You right click on the picture you want to know about. Choose “Search Goggle for image”. Then you will see all the pages that have your image.
Use Copyright notice
I got the advice from WordPress support to add a copyright notice so that visitors will be aware of what will happen when they take a picture. There is a page called creative commons where you fill in some options and that will create a link/icon which you add on your page to look like this:

This work is licensed under a Creative Commons Attribution-NonCommercial-NoDerivatives 4.0 International License.
This icon stands for different demands that the user can choose from. The icon above means you can share but not use for commercial use, if you use the picture you have to give credit to the person who took the picture. You can not rebuild or remake the picture. For more information about this the creative commons page will explain it.
2017©Expressive Photos

Slooooow shutter speed
Some people work in a office all day, some people work with sparks
Catching the sparks from the fire is easy. You just slow down the shutter speed and you will have long sparks coming out from the fire, instead of small dots. Check the below pictures to see the difference between fast and slow shutter speed.
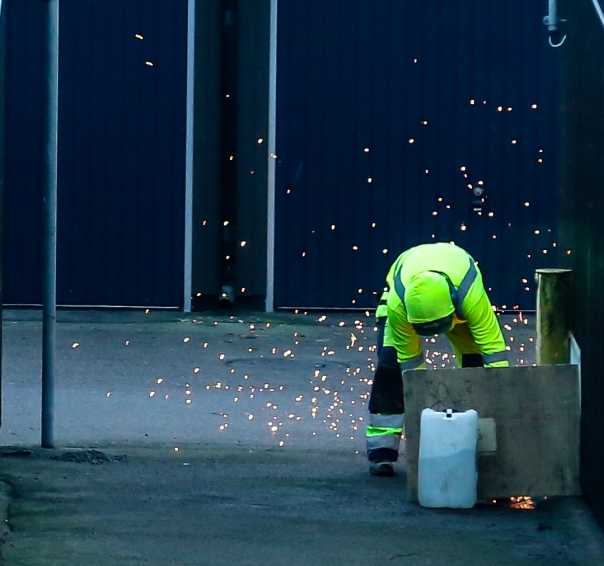
Fast shutter speed: Shutter speed is at 1/100 of a second and the sparks looks like dots
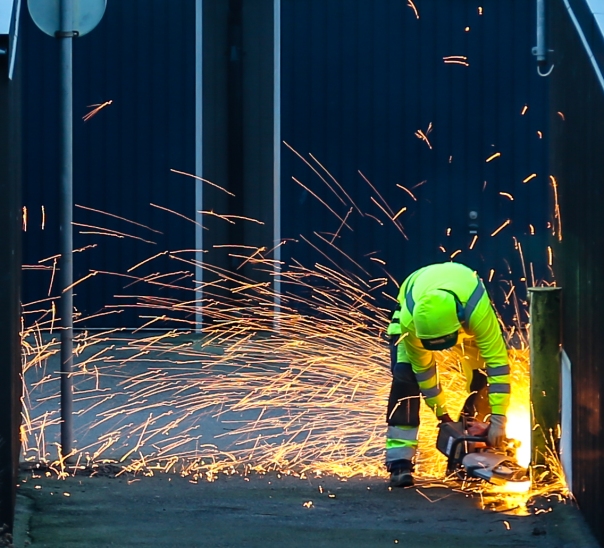
Slow shutter speed: Shutter speed at 1/13 makes the sparks longer
In these pictures I am using a shutter speed of 1/10 to 1/13 of a second.


I have croped out a little part of a big picture to only focus on the worker. So the sharpness might not be so good since he was pretty far away when I took these pictures. If you are wondering what he is doing then he is removing s steel pole. These pictures are taken with Canon 6D (full frame) and 24-105mm lens at f4 and f5 with ISO100 to ISO160.
When is it usefull with slow shutter speed?
- when you want to create cool light messages. You can write words with a flashlight and using slow shutter speed to create bright letters
- when taking pictures of fireworks
- if its pretty dark out and you want the picture to capture more light then slow shutter speed is a option, dont forget to use a tripod
- when taking pictures of cars head ligths or tail lights on a road, you might have seen the night pictures of red or yellow lights that are like lines on the roads. That can be made from very slow shutter speed
To control the shutter speed you can use the option called TV (Shutter Priority Mode) on Canon and S on Nikon.
2016©Expressive Photos

Trying out Hoya ProND 1000 with 10-stops
Is Hoya ProND 1000 filter with 10-stops worth buying?
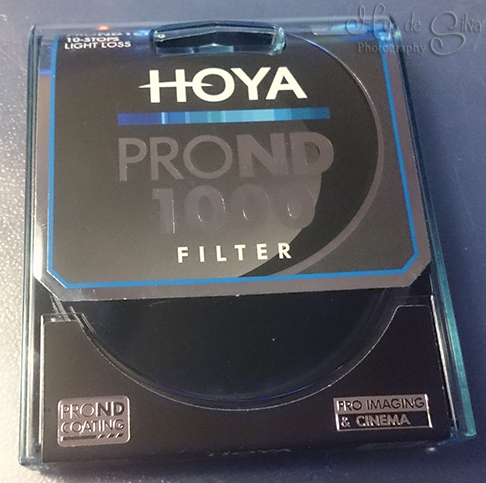
Hoya ProND 1000
Many people seemed to like this ND filter because of the valuable price and because it did not go towards the red or green colors. It is what it is suppose to be, neutral in colors. This filter have 10-stops which means it is a very dark filter which basically do not let in much light and you can use that for long exposures. When you want to use it you need to focus on the object before you put the ND filter on. So why you want to have long exposures? See the picture below then you will see what happens to the water.
It looks like smoke or fog is between the stones. The ocean waves are coming fast and hitting the stones and splashes all over but you won’t see that since the picture will make the moving objects look more smooth. When you have a long exposure the camera captures everything that happens within the limited time you want and it will become one combined picture.

The picture above was taken in Bulb mode with 56 sec in exposures. The hard part is to know how many seconds you are suppose to have since you wont be able to see the picture while doing it. The LCD screen will be dark even if you have chosen to see the image through it. Using slow shutter speed will make the picture cool and mystical.
It is all about guessing how long time you need to make the perfect picture. There are mobile apps that can calculate this for you so that you know exactly how many seconds you need to make the picture brighter after putting on the filter.
An advice is that you use the zoom in button on your camera when you are ready to focus on something. For example the picture above, here it is good to focus on a stone and zoom in to see that it becomes real sharp. Then just leave it like that and press the button to take the picture.

To see the picture better click on it to get a bigger size and more details. This picture of the waterfall have a exposure time of 49 seconds. The water becomes softer when you have long exposure. The light in the picture will also become brighter the longer you keep the shutter open. The leaves in the picture is still very visible since they are laying still compared to the waterfall. A tripod is a must when you have to wait for so long to take a picture. The good thing is that you can use low ISO, this picture have 400 in ISO.
When you have low ISO numbers the picture will not have so much of the grainy touch to it, which is good. If you want to have a clear picture, then keep the ISO low. This kind of photography technique takes lots of patient to get it right. You have to try different shutter speeds till you find the right one for your picture.
This filter is really great, it works and it serves it’s purpose. It cost at the moment around 70-80 US dollars.
2016©ExpressivePhotos


