Blog Archives

Trying out Hoya ProND 1000 with 10-stops
Is Hoya ProND 1000 filter with 10-stops worth buying?
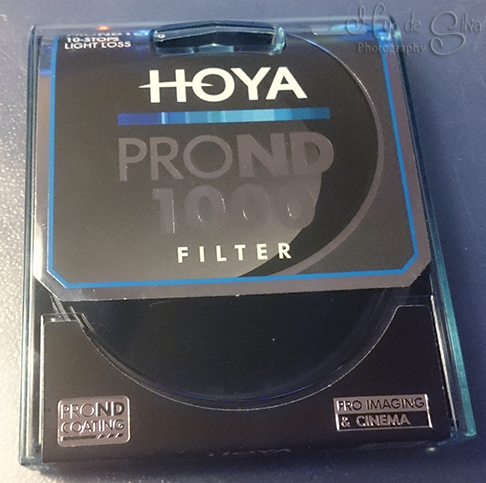
Hoya ProND 1000
Many people seemed to like this ND filter because of the valuable price and because it did not go towards the red or green colors. It is what it is suppose to be, neutral in colors. This filter have 10-stops which means it is a very dark filter which basically do not let in much light and you can use that for long exposures. When you want to use it you need to focus on the object before you put the ND filter on. So why you want to have long exposures? See the picture below then you will see what happens to the water.
It looks like smoke or fog is between the stones. The ocean waves are coming fast and hitting the stones and splashes all over but you won’t see that since the picture will make the moving objects look more smooth. When you have a long exposure the camera captures everything that happens within the limited time you want and it will become one combined picture.

The picture above was taken in Bulb mode with 56 sec in exposures. The hard part is to know how many seconds you are suppose to have since you wont be able to see the picture while doing it. The LCD screen will be dark even if you have chosen to see the image through it. Using slow shutter speed will make the picture cool and mystical.
It is all about guessing how long time you need to make the perfect picture. There are mobile apps that can calculate this for you so that you know exactly how many seconds you need to make the picture brighter after putting on the filter.
An advice is that you use the zoom in button on your camera when you are ready to focus on something. For example the picture above, here it is good to focus on a stone and zoom in to see that it becomes real sharp. Then just leave it like that and press the button to take the picture.

To see the picture better click on it to get a bigger size and more details. This picture of the waterfall have a exposure time of 49 seconds. The water becomes softer when you have long exposure. The light in the picture will also become brighter the longer you keep the shutter open. The leaves in the picture is still very visible since they are laying still compared to the waterfall. A tripod is a must when you have to wait for so long to take a picture. The good thing is that you can use low ISO, this picture have 400 in ISO.
When you have low ISO numbers the picture will not have so much of the grainy touch to it, which is good. If you want to have a clear picture, then keep the ISO low. This kind of photography technique takes lots of patient to get it right. You have to try different shutter speeds till you find the right one for your picture.
This filter is really great, it works and it serves it’s purpose. It cost at the moment around 70-80 US dollars.
2016©ExpressivePhotos
Pictures of fire
During earth hour my city arranged for a fire show. It was a nice event and here is some picture from it. The fire performers are called Favilla.
I have not tried to take picture of fire before so this was a good experience to learn which setting that suited me the most. I have used a Canon 60D with a prime lens of 40mm. I have tried different apertures to see which one that suited the most. If you move the mouse over the pictures you will find out the setting that I have used for each picture. It might be useful for you when you want to try to take pictures of fire. The settings worked for me and might work for you too.


What is common with all the pictures is that the pictures where taken without a flash. Most of the pictures are also cropped to remove unnecessary elements that take away the focus from the performers. Some pictures might have a green light because I had my Circular Polaris filter on as I do not have a UV filter for this lens yet. The CPL filter will also have made some effect to the picture even though I did not pay much attention to the filter and did not turn it because I only wanted to test the setting on the camera at this event.


When I took the pictures I choose tungsten in the white balance mode.

All the pictures are taken handheld, no tripod have been used. I love the sparks from the fire in this picture.

2014©ExpressivePhotos
Closer look at the Tamron 150-600 mm
Ever wondered what all the Letters stand for that comes after the aperture number? The Tamron 150-600 mm f/5-6.3 DI VC USD has DI “Digital Integrated design”. VC stand for Vibration Compensation. USD stands for “Ultrasonic Silent Drive”. Lets take a closer look at the Tamron 150-600 mm lens. I let the picture do most of the talking:

With the lens you also get the big lens hood and the detached tripod mount. This particular lens version is for Canon.

When the lens is set for the lowest of focal length of 150 mm and with the lens cap front and back the lens is about 27 cm (10.62 inches).


When the focal length is set to 600 mm the lens is about 35 cm with the front and back cap.


The zoom is from 150 mm to 600 mm. Which make it a great ultra lens for outdoor shooting. It has a zoom lock as well.

VC stand for Vibration Compensation and it is Tamron’s image stabilization system.

The lens is 95 mm. It might be hard to come by this lens size but online you can find shops that have filters for this size.

I have bought a filter called B+W UV 95mm MRC, which one shop was selling especially for this Tamron lens. This filter also have a sky-lighter filter which give a pink tone and make it a warmer color tone in the picture.
For a full review on Tamron 150-600 mm press “follow” button to get the review of Tamron 150-600 mm lens.
2014©ExpressivePhotos
Tamron 150-600 mm lens is coming!
The order is done! I am now just waiting for the Tamron 150-600 mm lens to come any day now. I have been waiting and waiting for a store to have this in their supply and yesterday it was available in a online photo store. It cost me around 11 000 Swedish kronor with shipping. I will get the lens tomorrow if everything goes according to plans.
I was first thinking of ordering it from B&H photo store in New York, but when you add the cost for customs, shipping plus 25% in tax, it does not feel worth it. I was also unsure if the warranty would be valid here in Europe since the Tamron site for Europe have been writing we need to have a warranty valid in Europe, that you will only get if you buy it from Europe.
 I also read about the warranty that Tamron have for 5 years. You have to register within 2 months after purchased in order to get the warranty, otherwise you only have 1-year warranty. There are some policies that might not be so good in it. One issue as I see it is for example that the warranty is not transferable. So if you sell the lens in second hand, the person who buys it will not get the warranty.
When I was ordering the lens I was given a option of including a insurance for the lens. I was thinking about adding one because if something happens I want to be sure it will be covered by the insurance. Then I came to think about the home insurance that I have which covers everything I own. So I gave my insurance company a call and was happy to know that even my camera is covered and that even if I happen to drop the lens it will still be taken cared of. So it is a good idea to check all these things before you buy anything. Otherwise you end up signing unnecessary insurance. I saved 1000 SEK by not taking the lens insurance.
I have seen lots of nice pictures that other photographers have taken with this ultra lens, it really is a good lens. Soon it till be time for me to also try my best to take nice pictures like I have seen is possible. It will be my first ultra zoom lens so I am really excited about that. Now I feel like I do not need to buy any other super zoom lens because the Tamron 150-600 mm covers the whole range of focal length that I need. I will be using this lens for nature photography, especially for wild animals and birds.
The weight of almost 2 kg makes it possible to hand hold the lens, not like the heavy kind like Canon 600 mm lens. I predict this lens will be many peoples favorite lens, the price is also a big factor. Now most people can afford to have a ultra zoom lens without selling their car to afford a really good lens.

Are you also about to buy a Tamron 150-600 mm lens or at least thinking about it? Then click the follow button to get more information about what accessories I will use for this lens and you will get to follow the process of using the “Bigron” like some people call it. If you have any questions let me know. I will be writing about the filter I choose for this lens in another post. It will also be the time for me to start looking for a bag for this lens, as it might not fit in the bag I have now.
2014©ExpressivePhotos


