Blog Archives

Looking for a budget lens with great sharpness?
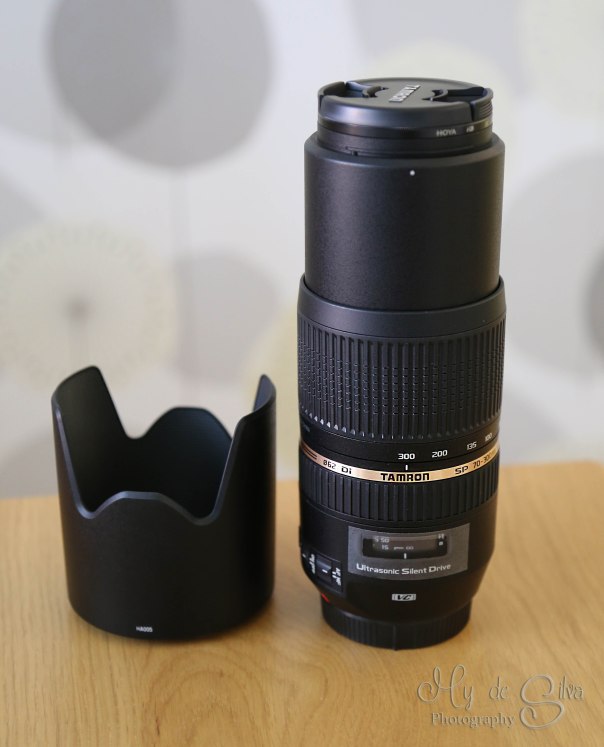
Then the Tamron 70-300mm is the answer
I wanted a camera that I could use during a Europe tour. I was not looking for a fancy lens, I just wanted a simple easy to use lens. I found Tamron 70-300mm. This lens is called Tamron AF SP 70-300mm F/4-5.6 DI VC USD, but who can remember to say all of that?


I combined this lens with my full format camera Canon 6D. It was performing great. The auto focus on this lens is outstanding. It is absolutely steady when you want to take the picture when the auto focus is on. That is a big plus for this budget lens. The price is in favor for this Tamron lens, only 3000 SEK (350 US Dollar).
At 300mm
I combined this lens with my full format camera Canon 6D. It was performing great.
These pictures are taken at a folk dance event called europeade in Sweden with the combo Canon 6D and Tamron 70-300mm. The lens give sharp pictures, even when objects are moving.

This picture is taken with the combo Canon 70D and Tamron 70-300mm

I have noticed a little vignetting when I took some pictures at a airshow with the combo Canon 6D and Tamron 70-300mm. This happen when it was very bright sunshine that made everything look dark in the viewfinder. It can be that the sun was very bright and made the picture little darker sometimes and I had to put up the brightness in the camera. Otherwise the lens have really performed great all the time when I have used it. This picture is taken at 300mm. See example below:
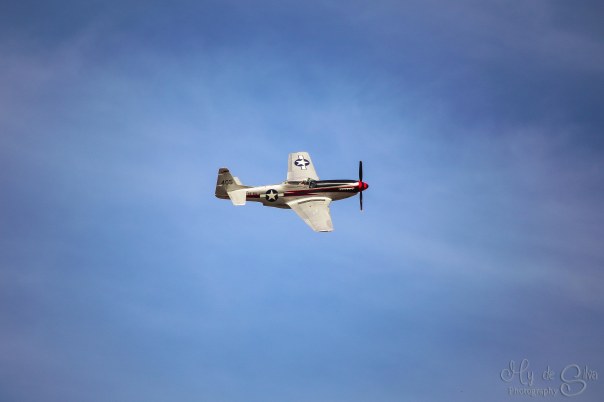
The aperture starts at f4. This means the background might not be as blurry as you might wish for, but this can be done in Photoshop or Lightroom in post-production. So it is not a big deal.
The lens might be little heavy but if you are used to a lens like the big zoom lens Tamron 150-600mm. Then Tamron 70-300mm is not heavy at all.
It fits nicely into my small camera bag where I have a Canon 50mm f1.4 lens and Canon 24-105mm lens. Together all the three lenses will cover all your need when its comes to street photography, travels, dance events and even bird photography.
Want to know more about Tamron lenses? Click here for more info about Tamron 150-600mm. Maybe you are more into macro photography? Then Tamron 90mm is the lens for you
2015©Expressive Photos

Capture PRO – accessory for your camera
Gadget that can make life easier as a photographer


Imagine when you are hiking or walking in the forest and you don’t want to have the camera around your neck but still want to access it fast. Then a camera clip attached to your camera bag’s strap is a good thing to have. I have found one from peakdesign. It is called Capture PRO. You can have it on the belt around your waist or on your bag. You can have it horizontal or vertically. You put the red plate under your camera then you attached the rest on the straps of your camera bag.


It is easy to use and that is the most essential when it comes to camera clips. It has a red button that is the release button. You can also turn the top of the button to stop the plate from moving. There is another screw that can be turned to give more safety and locking it safe. The screws on the far end of the sides control the size of the gap so that you can attached it to a big/small bag strap.

Another good thing is that you can attached it to your tripod. It has a fast grip so you fast can put it on or take it off the tripod. Just release it by pushing the red button.


The picture above demonstrate how the camera will be attached to the bag. I even tried with my Tamron 150-600mm lens which is a huge lens. It still could hold that lens with a camera house. I would suggest to only have smaller lenses on the camera clip for your own safety and because you should avoid uneven and heavy weight on one side of your bag.
If you need to use two cameras and you want to switch fast between them then one you can have around your neck and one attached to the camera clip. That will make the photography process go fast. Otherwise you would have ot open your bag again just to take out the other camera. With the camera clip you can avoid wasting time and enjoy photography.

The cost for the Capture PRO is at the moment around 61 US dollar. I got a good offer from a online site so I bought two. One for me and one as a gift.
To see a video clip of how to use it check it here. If you want to know more about Capture PRO from peakdesign press here. On their homepage they have a lot of other great inventions.
If you have any questions you can always leave a comment.
2015©Expressive Photos
Lowepro Format 150 – a small bag
Looking for a small bag to fit your camera gears?
I needed a smaller bag for my vacation when I travel. Since I only needed to fit a camera house and 2 lenses I found Lowepro Format 150 bag to fit my purpose. On the front of the bag there is a little pocket where you can have extra batteries, memory cards and pens, etc. There is one pocket on each side of the bag for a tripod or bottles. There is no rain cover for this bag which is to bad because its a great bag otherwise. It weighs basically nothing only 0.5 kg.

I also tried to fit my big Tamron 150-600 mm lens in the bag and I could fit it too. See picture below to see how it looked. On the inside of the lid there is also a pocket for a 10″ tablet (Ipad etc). The bag can fit 5 small lenses and a camera house. To the left of the camera house you can see that the padding is divided to make it easier to have a lens attached with a camera house, that is a plus.

I have put the Lowepro Format 150 next to my usual bag the Lowepro 300 AW, so that you can have something to compare with.


All in all it is a great bag for travel. I used it for my vacation in Europe. I could pack it with all that I needed for my travels to different places. It will be the bag I am going to use if I am going out to take some pictures, especially for macro photography where I do not need any big lenses.
2015©Expressive Photos

My new lens – Canon MP-E 65mm f/2.8 1-5x macro
Taking macro photography to the next level


I got a recommendation about a lens for macro photography. So of course I had to have it and here it is! It is the Canon 65mm f/2.8 1-5x macro lens. Forget about extension tubes or close-up filters, because you only need this lens to take great macro pictures. This lens is not for amateurs, then I would suggest you first start with Tamron 90mm f/2.8 or Canon 100mm f/2.8. The Canon MP-E 65mm do not have image stabilizer and no auto focus. So what is the advantage with this lens then? Answer is 5:1 macro, it is hard to beat that with any other lens. The Tamron 90mm and Canon 100mm only have 1:1 macro.
In the box there is only the lens and a CD and warranty papers. It did not come with a bag or a lens hood, that you have to buy seperatly.
I haven’t been able to try it out yet. Pictures of what this little lens can do will come soon. For now I will just show you some picture of the lens itself.


The lens comes with the front- and back lid and a removable tripod collar. It is a pricey lens for about 1049 US dollar.

This lens needs a flash of some kind, for example a ring flash is good when you take on insects and flowers. This is because when you zoom in it will get darker then you need light to brighten the picture up. The aperture range is from f2.8 to f16. It is also possible to use Canon extender 2x to get a even larger magnification. Stacking is a good way to get sharp images from this kind of lens. It is almost necessary in order to get a whole insects face sharp using stacking. I will try stacking and then post some pictures to show the results in another article here on Expressive Photos website.

Click on the “follow” button on the right sidebar to get more news.
Copyright©2014 Expressive Photos

Tripod – Triopo GT3232X8C + ball head NB-3S
I bought my first tripod and after many searches on internet I decided I wanted a Carbon fiber tripod. Carbon fiber tripods are light weight which is good when you are walking a lot and do not want to carry heavy tripods.
I saw a offer on Triopo GT3232X8C where I got the professional ball head Triopo NB-3S for free. It cost me 2299 Swedish kronor ($332 or €249). So I thought that was a pretty good offer. I have not heard of Triopo before but I was willing to give it a chance.
I got it delivered today and here is some pictures of it.


The folded size of the tripod is about 48 cm. The tripod can become 190 cm, that is really high. It is good if you want to be able to take pictures over everyone’s heads. It is really light weight, it only weighs 1.4 kg and can have a max load of 15 kg. I have read in some reviews about this tripod that they have a hard time folding it into the bag. I have tried it without any problem. So it works to have both the ball head and the tripod in the bag if you know how to turn the legs 180 degrees. That its what the first picture shows, it is folded with the ball head.
At the end of the legs you can turn the rubber feet and the spikes will come out. The spikes are good for outdoor photography when you need extra grip on the ground. Make sure to keep the spikes hidden in the rubber feet when you are indoor to not damage the floor. One leg can bee screwed off and use as a monopod.


The camera plate is having a smart function where you do not need a tool to screw it into the camera. There is already a handle that you can turn easily.


There is a smaller bar included for example when you are taking macro shots. It means you can spread out the tripod legs and use the small bar to get as low as 28 cm from the ground. You can always turn the camera upside down and use the bigger bar as well. There are lots of options with this tripod.
There is another function as well and that is the hook. You can use the hook to put some weight on the tripod to make it even more stable when you are in a windy place.


The ball head I got in the offer is called NB-3S. It is Triopo’s very own professional ball head. So I did not have to worry about if it would fit the tripod. It weighs 0.57 kg. This ball head can take 12 kg, so it is good for bigger lenses. I will be able to use my Tamron 150-600mm on it without any problem. It does not have the quick release button that many ball heads have. This one uses a screw to open and remove the camera plate, it makes it slower but it does not matter to me. It goes pretty fast to screw the plate on place too. The ball head is smooth and easy to use.


I have not tried it outdoors yet but I will write about the tripod when I have tried it out more and give a full review.
Do you have any questions? Feel free to comment and I will answer. If you have used Triopo what is your experience from it? Do not forget to like my page on Facebook to keep yourself updated with the latest news. You can also follow this page so that you get the new articles.
Copyright©2014 Expressive Photos


